Saturday, August 31, 2013

Nail Art August Day 11: School

I knew right away I wanted to do little pencils for today's nail art challenge. I feel like I can't do some nail art because of the shape of my nails, but these pencils were perfect for my shape! 


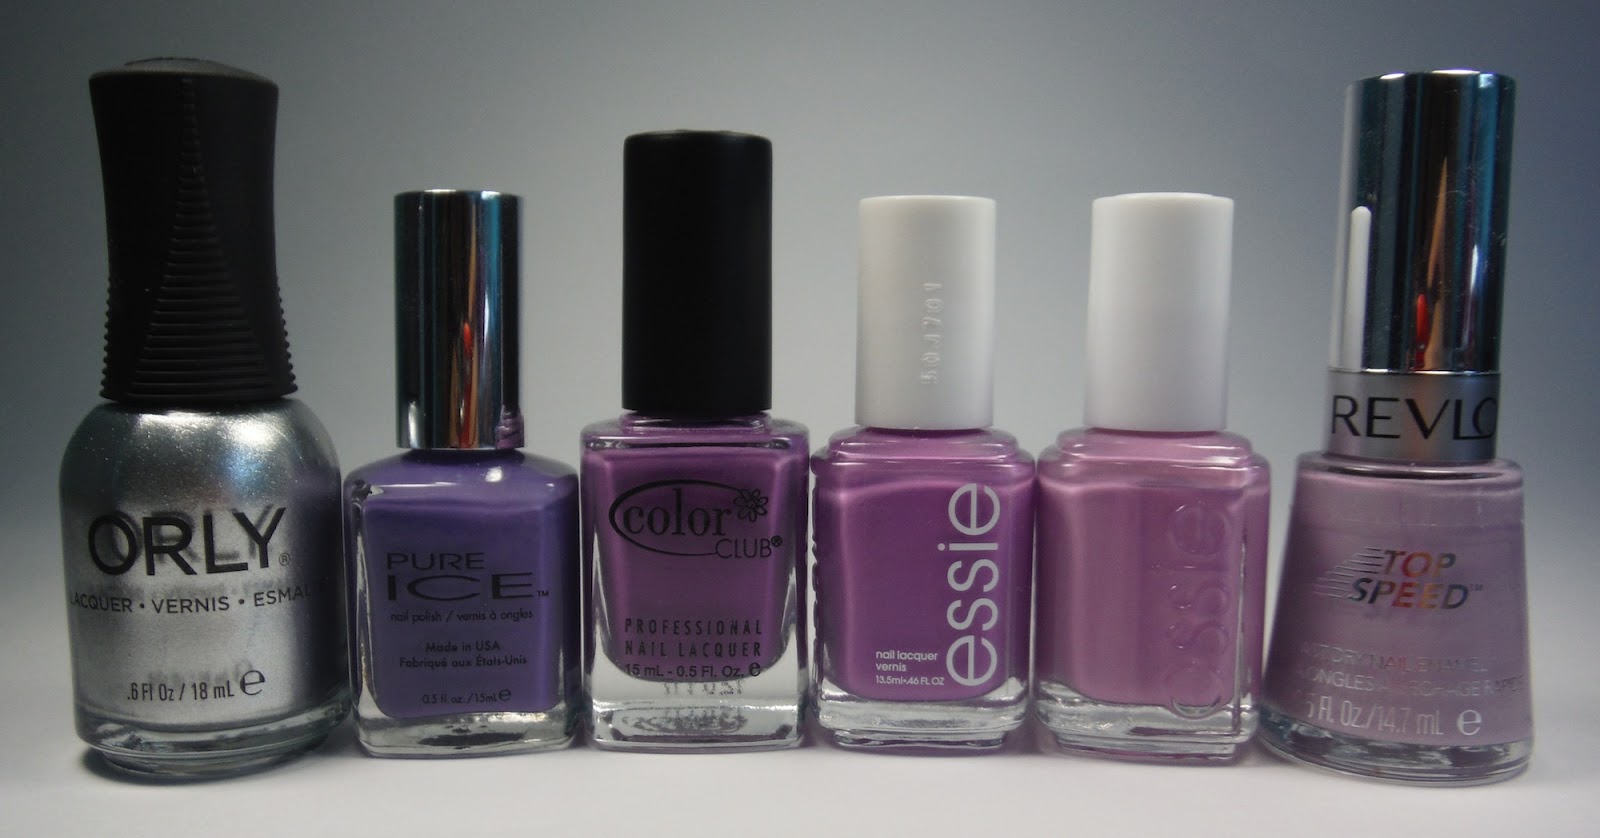
Here are the polishes I used: 


Orly - First Kiss, Zoya - Kylie, Sally Hansen - ,
Sinful Colours - , NOPI - Positive Energy 

For this mani I started out by painting all my nails with three coats of Orly - First Kiss. I then painted the eraser part of the pencils, as well as the yellow part. I used a dotting tool to create a little ruffle on the bottom to imitate a real pencil's ruffles. Next I used a striping nail art brush to paint a bit of a darker shade of yellow lines down the length of the pencil. I then used the same striping nail art brush to paint silver lines horizontally to imitate the piece of metal that attaches the eraser to the pencil. I finished by adding some black to the tips of my nails. 


And here's a fun shot of this mani!


I'm really pleased with how this mani turned out! I would like to fix a couple things if I ever tried it again though. I would have liked the ruffles on the pencil to be a bit bigger, a larger area of the wood (between the yellow pencil and black lead) and more evenly shaped lead tips. I really think these colours are perfect together for this mani though!

XO Natasha 

Wednesday, August 28, 2013

Nail Art August Day 10: Match OOTD


Most of my clothes don't have very complicated designs so I knew right away I would match my nails to this romper for today's challenge! I don't even remember where I got this romper, but I was in love with the tribal-ish pattern and how it was strapless with the extra ruffle at the bust. It also has pockets which is something my sister and I go crazy for in rompers and dresses hahaha. 


Here are the polishes I used. I really love these colours together, they're nice and contrasting and the purple, pink and orange add just a little girliness.


China Glaze - Turned Up Turquoise, China Glaze - Aquadelic, Pure Ice - Jailbait,
N.Y.C. - Pink Promenade, OPI - A Good Mandarin is Hard to Find,
Sally Hansen - Barracuda, Joe Fresh - Mocha 

In the picture of my nails above it's a little hard to see the difference between the pink and orange so here are my nails with flash.


The stripe part of this mani was easy as pie, I only struggled a bit with the tribal parts. I didn't plan for my nails to come out kind of similar - with tribal at the tops and just stripes at the free edge of my nails but that's how the pattern got divided up.

On my pointer finger the design is supposed to be white X's with a bit of pink and brown accents. I tried really hard to feather the design on my pointer, middle, and ring fingers. The problem with working with polish is that it dries so quickly that you have to get fresh polish every time it starts becoming tacky.


These nails were really fun to wear but they wouldn't be my first choice of nail art. I enjoyed replicating a pattern onto my nails but I found parts of it to be a little difficult, which is good because it got me trying a couple new designs that I wouldn't have normally tried!

XO Natasha 

Sunday, August 25, 2013

Nail Art August Day 9: Bold

I won't lie, I had a little bit of difficulty figuring out what to do for this challenge. Bold to me is anything that pops. At first I thought neon, then I thought maybe colour blocking or some sort of design, like a tape mani, that would be really drastic. But I wasn't happy with either of those ideas. Bold to me also means contrast. So, having fairly light skin I decided to go with a really dark colour. 

I recently purchased OPI - Ink and now was the perfect time to use it! I obviously couldn't do just a solid colour so I chose to add some rhinestones. I've used these triangle rhinestones before (purchased from the Born Pretty Store) on my Taylor Swift Nails. In that mani I placed the rhinestones at the base of my nails, this time I placed them at the tips for an extra claw-like look. 

You may have realized I love simple manis, and yes, I absolutely adored this one. Normally I'd put a top coat on after the rhinestones but I knew I would be taking this mani off very soon so I put the rhinestones on top of the top coat. 


Aren't those rhinestones just gorgeous?!


Ink looks a little dark in the picture above, but IRL you can really see the duochrome flakies or whatever is in that bottle. I have no idea, all I know is it's magical. Ink is very similar to another OPI polish I own, called Russian Navy. RN is also a navy blue with pink glitter. The difference is that RN is a blackened navy blue and the glitter is very slight, whereas Ink is a bit more jelly (though opaque in two coats) with significantly noticeable pink flakes/glitter. I originally had a picture holding the two bottles together but it came out blurry :( 


I'm kind of loving this hand pose lately... 


Ink sure is a beauty! 


I felt like a bit of a witch with this mani... first of all because I have pointy nails but even more so because the triangle rhinestones accent the pointy nails. I really felt like I had claws! 

XO Natasha 

Thursday, August 22, 2013

Nail Art August Day 8: Ombré

As always, I try and do something a little different than the general population when it comes to these nail art challenges, so today I did a polka dot ombré. There's a lot of debate when it comes to the difference between a gradient and ombre but to me a gradient is when two colours fade together on one nail and an ombré is when the colour goes from light to dark (or vice versa) and each nail is one solid colour. 


As soon as I saw ombré, I knew this is what I wanted to do. I love silver and purple together! 


Orly - Dazzle, Pure Ice - Jailbait, Color Club - Lavendarling,
Essie - Playdate, Essie - Under Where?, Revlon - Lily


I think these colours go really well together for the ombré. If you don't have a lot of polishes it's sometimes hard to get a perfect ombré but luckily most of my purples are similar so this worked out nicely! I don't think I'd be able to do an ombré with any other colour. Blue maybe, but it would be a little rougher than the purple. 

This mani also gave me a chance to practice my polka dots. I don't do them often because I never used to like them - I'm starting to now though! I was kinda shaky the day I did this mani and I know I could have done a better job, but looking at this mani as a whole I'm really pleased with how it turned out. This was also my first time using my new silver, Orly - Dazzle. It's a foil whereas my other silver (NOPI - Positive Energy) is a metallic. 

XO Natasha 

Monday, August 19, 2013

Stiletto to Square

WAHHH. Okay so if you know me you know I'm totally obsessed with my nail shape. I used to call it almond, some people call it stiletto, but I now think it's a hybrid of oval and stiletto. Actually they're a little flatter and less pointy than I like them in the pictures below but if you look at my previous posts or follow me on instagram you can see slight variations in the shape. 


Tomorrow I'm starting a new (sort of) job at McDonald's. I worked there for two years before but it's been a year since I last worked there. The length of my nails wasn't a problem, and I'm sort of okay with the no nail polish rule. I mean it sucks of course, but I'll be making money so it was fine. I'm only allowed one piercing per ear though, and I have six on each ear. Taking out my lobe piercings, three on each ear, is easy but the others are a little more fiddly. If I'm gonna be constantly switching earrings around, it's gonna take around an hour each time with the length of my nails. SO I decided to chop them off :( They also were a little unhealthy from lack of care the past few days. 


I also needed a change. I love love love my nail shape but actually shaping them was getting a bit annoying. When I first got into nails the square shape was my favourite but it never lasted long because the "wings" always broke off. I decided to try square nubs again and then as they grow out file them round, then finally back to my original shape. 


I know my nails are going to be so much healthier like this and while it kills me that I have nubs (I think they make my hands look like man hands) I'm excited to, once again, watch them grow out. I'm also looking forward to trying some nail art that's more suited towards square nails and that would have looked odd and out of place on my original shape. 

I soaked my nails in warm water for a few minutes then used a pair of straight nail clippers to cut my nails. I cut them a bit longer so I could file the rest. When you use clippers you risk damage to your nails so I recommend cutting them longer so you can file down to the length you want. Then I used a finer file to smooth out the edges and finished by doing my cuticles. Sorry there's some cuticle messiness in the pictures above, I was too keen on taking pictures haha. 

XO Natasha 

Nail Art August Day 7: Stripes

Around three months ago I purchased my first striping tape. I had a lot of fun making really complicated designs, and I figured that's what I would do for today's post. But typical me, I really wanted to do something different than what the majority of people would do. Instead of making it really complicated, I decided to make it really simple. 


This mani is inspired by my bedroom. It's got a piece of trim in the middle of the walls. I was originally going to use the colours from my room but I decided to try out some new polishes instead! 


Orly - Rage, Essie - Naughty Nautical

Here's a shot of Rage before I put Naughty Nautical on top, isn't she a beauty?! 


And one last shot of my nails! It was hard to get Naughty Nautical to photograph properly, it's a little brighter in person than in the pictures. I used striping tape to create the lines. 


I absolutely love the simplicity of this mani, and I think these two colours look amazing together! 

XO Natasha 

Friday, August 16, 2013

Nail Art August Day 6: Animal Print

Up until now the only real animal print I ever did was leopard. I tried giraffe on my sister once but it didn't turn out as well as I hoped, though it still looked neat. (It actually kind of looked like a dinosaur egg!) Since these nail art challenges are meant to push you out of your comfort zone and try things you maybe never would otherwise, I wanted to attempt all different kinds. 


I would do leopard on one nail of course, but I also wanted to do giraffe and zebra. I needed one more for the last nail and I saw someone did cow spots so that was my inspiration. On my practice fingers I did zebra about 5 times, giraffe once and cow once. I did my nails and I was really happy with them but I knew there had to be something I could do on my thumb... tiger print! I practiced on the finger again and liked it a lot. 

After one day of staring at the cow print I didn't like it because it didn't really match the rest of the prints. I searched cheetah but it's just plain dots. I decided to do a bunch of little c's. I've seen some people do this design for leopard but without the coloured spots inside it's not actually leopard, and I know it's not cheetah but that's what I'm calling it!

For these nails I really wanted to keep the colours as close as possible to the real animals so there was no doubt at all which print was which. 

OPI - A Good Mandarin is Hard to find, NOPI - The Next CEO, Orly - Buried Alive,
Zoya - Piaf, Joe - Mocha, Zoya - Jacqueline 


I really want to do a crocodile/alligator print someday. I tried it on a practice finger but it didn't turn out at all. A green print would look really cool since most of the colours are browns/blacks/whites. 

I'm very pleased with how this mani turned out and I have a feeling my friends are going to request it once they see it! I'd also like to maybe try doing these nails with funky colours, although the giraffe might look a little odd. I think the tiger, leopard, zebra and cheetah would still be pretty distinguishable though :) 

XO Natasha 

Tuesday, August 13, 2013

Nail Art August Day 5: Cutsey

Alright so when I think of "cutsey" I think of bows. I really wanted to add bows on this mani but I'm awful at drawing them with dotting tools. I have a stamping plate that has a bow on it but I'm no good at placement so it would have turned out messy (I practiced about 1o times and still decided against it!) I still think this mani is really cute the way it is and I'm happy with how it turned out :) 

I began by using binder reinforcements to create half moons. The green/mint polish is Essie - First Timer. This was an untried, and I love it! It dries a little different than the bottle colour, though. It's a little darker and a little more green when dry. 

I used dotting tools for the dots, obviously, and I used a thin brush for the stripes. I'm not happy with my middle finger stripes. I usually begin on my thumb (because you can barely see it so it doesn't matter if I mess up) but for whatever reason I forgot and started on my middle finger. By the time I got to my pinky the stripes were perfect though! 


Here's my mani with the bottle. I'm not sure if you can see the polish colour difference in the bottle vs on my nails. It's very slight.


I never really used to like dots but I'm starting to after this mani and one I did a while ago, my summer floral nails. I've always loved stripes and I'm glad I'm getting better at freehanding them with a brush, it's so much faster than tape!

XO Natasha 

Saturday, August 10, 2013

Nail Art August Day 4: Sparkles

For the "sparkles" challenge I wanted to try something really different... So I went with black! It's not the first colour anyone thinks of when they think sparkles, in fact it's probably the last, but I thought it might look really cool. 

I have a bunch of really fine loose glitter, so I figured I'd use that. I didn't want to just do full nails of glitter, I wanted to be a little more creative. I began by painting my nails black with OPI - Black Onyx. Then I used striping tape to section off parts of my nail where I wanted the glitter. I couldn't decide if I wanted to do vertical lines or chevrons, so I did both! 

I know it's really obvious how edited this photo is, but since this mani was black on black you couldn't see the design in the shade or in the light, so I had to use flash but that resulted in my hand being super bright. 


I think this mani is really cool, but I wanted the glitter to be more obvious than it was. I think if I were to try to do this again I would use glitter that has a bit of silver or some other colour in it so you're able to see it better on the black background. 

Like I said I sectioned off parts of my nail with striping tape and inside the tape is where I put my glitter. Since it's a little jar of glitter I either dipped my whole nail or dumped glitter onto my nail. This resulted with glitter everywhere on my nail and I had a difficult time dusting off the excess. If I were to do this design again I would do full glitter nails then paint on top of the glitter for an easier and cleaner design. 


Overall I really like the combination of chevrons and vertical lines! It's also pretty cool how the loose glitter ends up feeling textured when you've only put one layer of top coat on. I'll probably do this mani again, but use different colours, probably something more contrasting. 

XO Natasha 

Wednesday, August 07, 2013

Nail Art August Day 3: Character

As soon as I saw today's nail art challenge was "character" I knew exactly what I wanted to do! MINIONS! They are one of my absolute favourite characters. I was recently at Universal Studios in Orlando, Florida and let me just tell you... it was minion heaven! 


I've seen a lot of amazing minion nails so if you're looking to do minion nails on yourself there's a ton of inspiration out there. I try to plan out my nail art as much as possible on paper before I actually start on my nails so I have some sort of idea what to do. One thing I don't do that I should start is doing test runs on my practice fingers, after all that's what they're for! 

Here are all the polishes I used for this mani: 


Sally Hansen - Mellow Yellow, OPI - Suzi Says Feng Shui, Orly - Dazzle,
Beauty Treats - White, Joe - Mocha, Rimmel - Black Satin 

I started with three coats of yellow. I used striping tape to section off the bottom part for overalls then I used dotting tools to create the straps of the overalls. I did silver dots for the goggles, added black straps on the sides, then did the eyes - white dots with brown for the iris and black pupils (but I'm not sure if you can tell I did black pupils in the pictures). I added little G's (for Gru) on the overalls and did black mouths. I used dotting tools for everything except the hair - for that I used a fine brush. I wanted to do teeth and a tongue but I was afraid I would mess it up so I kept the mouths simple.


Aren't minions just the cutest things ever?! When I did these nails I hadn't seen Despicable Me 2 yet but I knew there were evil purple minions... Well I just watched it last night and I think they would be hilarious on my nails! 

XO Natasha 

Sunday, August 04, 2013

Nail Art August Day 2: Re-Creation

Today's nail art challenge is to do a re-creation. I wasn't sure if it was supposed to be of your own manicures or someone else's, I guess the option is up to you, but I chose to re-create one of my own. 


I think tuxedo nails are so cute, and they were one of the first designs I ever did! This was before I had dotting tools, so I used a toothpick. The polishes I used were Pure Ice - China Girl (pink) and NOPI - Positive Energy (silver). I freehanded the tips and used dotting tools for the buttons and bows. 


Although this mani basically looks the same, I do think it's a little better. I now clean up my manis for a start. Also, in the original picture I didn't put top coat on because I was waiting for the polish to dry and had to leave before I got the chance, now I would never dream of not putting a top coat on! I also take a lot better care of my nails and cuticles, and my use of dotting tools is a lot smoother. 

Bows are one thing I haven't quite yet mastered. I'm also not a big fan of combining two chromes. 

XO Natasha 

Thursday, August 01, 2013

Nail Art August Day 1: Gradient

After my two weeks of doing nothing I've been kind of unmotivated to do any nail art, so the Nail Art August challenge by @californails on Instagram came just in time! I was actually planning on doing a gradient, and like I said August came at the perfect time. 

As you can see from this post's title, the theme for August 1st was a gradient. I really love how sideways gradients look and I figured I'd use two pretty bold colours. I chose two of my newer polishes, both from China Glaze's Sunsational collection. I used Fairy Dust on top, of course. 

China Glaze - Too Yacht To Handle, That's Shore Bright, Fairy Dust


I'm not sure what to call this look, but on every nail I like switching the direction of the gradient so it looks like the two colours switch back and forth between nails. It only takes a little more effort and I really like how it looks! 

I just paint polish onto a slightly saturated makeup sponge and sponge the polish onto my nail. I find three coats is usually enough to make the polish opaque. I usually use a fine sponge but this time I used one that wasn't as fine. A lot of girls have said it makes the polishes blend together better, and I thought that would be useful considering I was using two contrasting colours. With such big holes though I found the sponge a bit harder to control. My middle finger didn't turn out quite as good as the others; my ring finger is my favourite. 


I know it's only the first day but I'm really glad I'm doing this challenge! Sometimes I just need a little help when it coms to nail art and deciding what to do haha! 

XO Natasha