Showing posts with label manicure. Show all posts

Thursday, February 07, 2013

NOTD: Flat Half Moons

So I just wanted to do a simple mani and use these two colours together since I tried to for my water marble but it didn't work out... Kaitlin from The Daily Polish was my inspiration! She did a "flat" half moon mani and I thought it looked really cool. It's a nice twist on the classic half moon mani, and I figured since my nails are round, a straight horizontal line would look cool. 

It's definitely different, but I think it suits square tips much better than round tips. I apologize for my messed up first finger, I was getting restless while waiting for the polish to dry and bumped it :( 


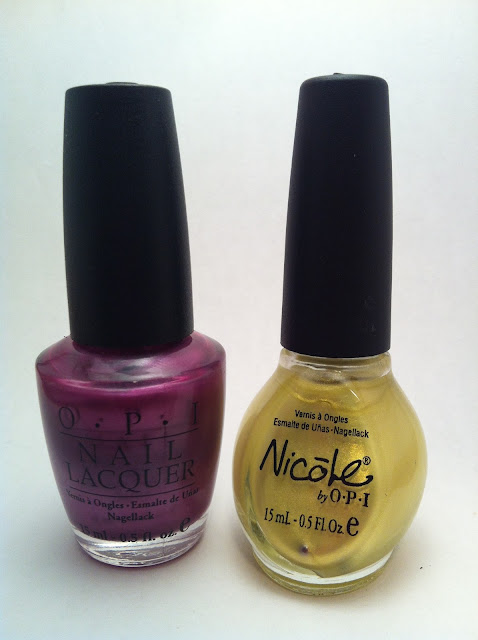
Here are the colours I used: OPI - 3 Plums, I Win! and NOPI - Lemon-Lime Twist. I've had them both for about 4 years and I barely use them, and I thought they looked really nice together! 


Friday, February 01, 2013

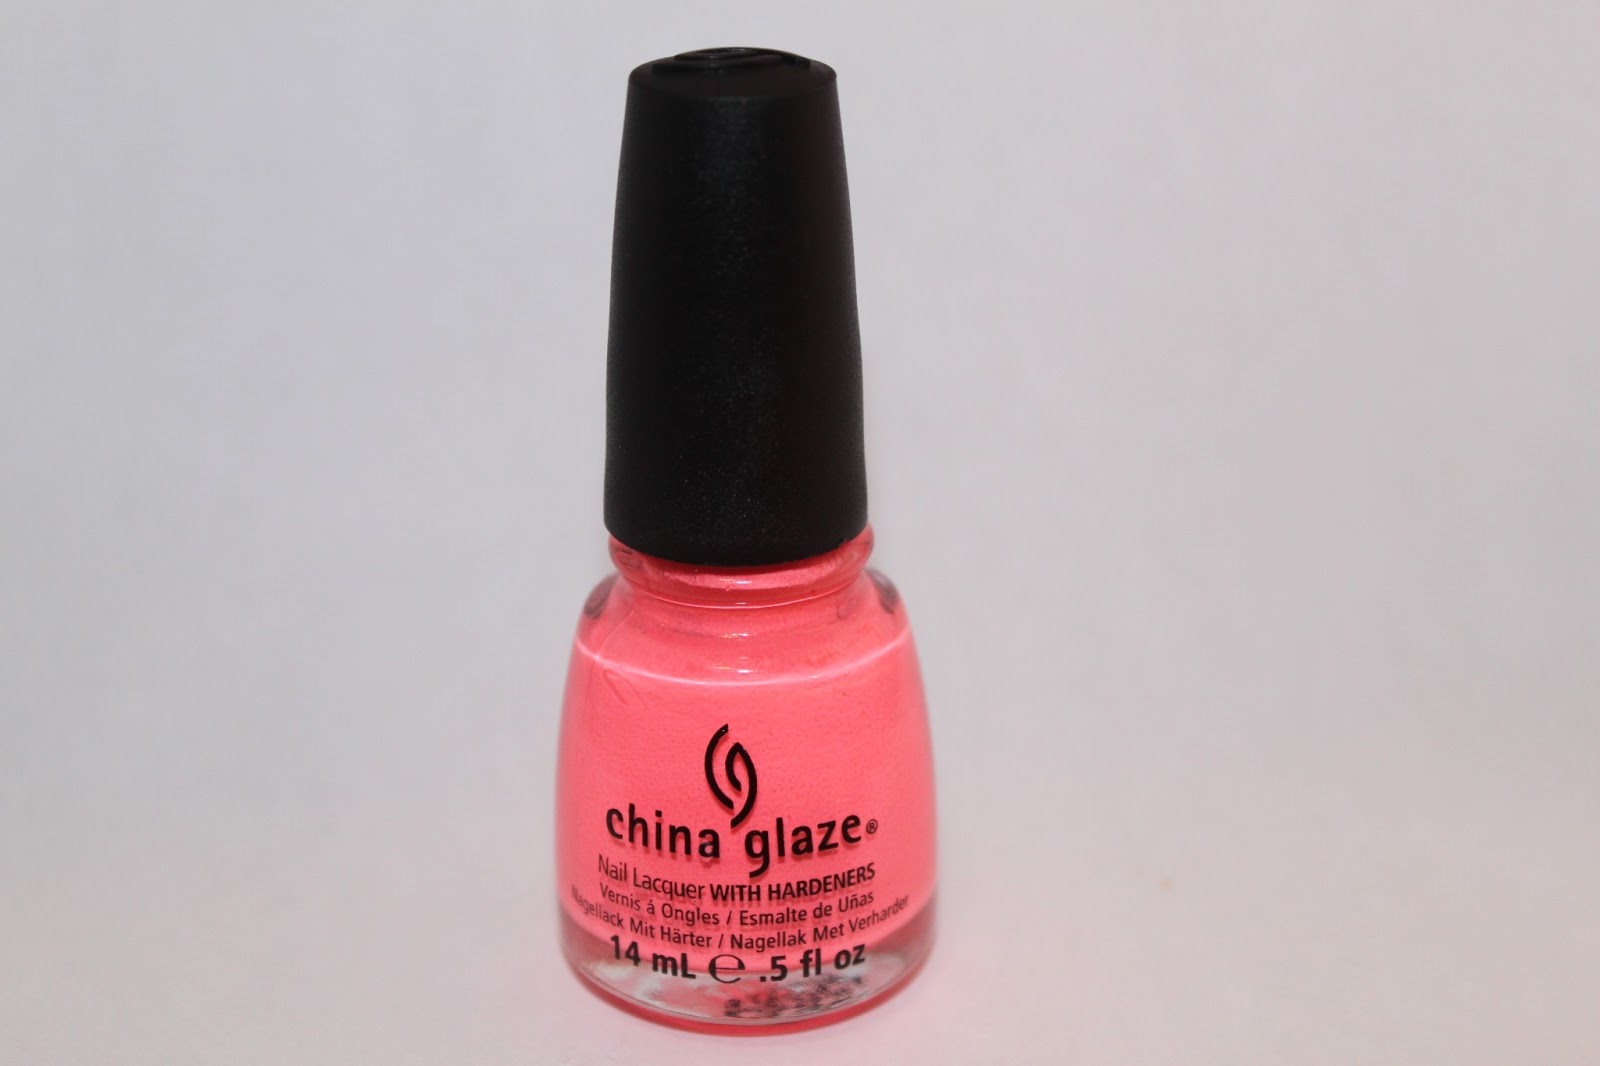
Untried Polish: China Glaze - Pink Voltage

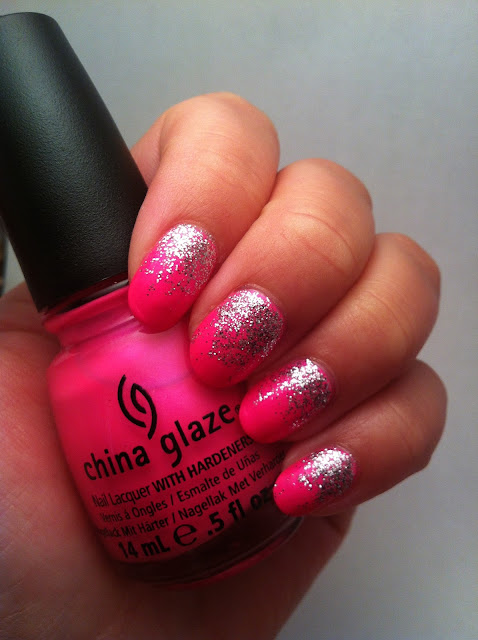
I was looking for the non-neon version of this polish for so long before I finally found it. I got it in a 3-pack from Nail Polish Canada. It came with Towel Boy Toy and Nova. It's just a classic bright pink, with a bit of pink shimmer. Although it's not neon, it's extremely hard to photograph, like most neons are. I tried my best with the pictures below, but they still aren't the true colour. I also added a reverse glitter gradient in Orly - Tiara. This is my first reverse glitter gradient, and I do like it, but it was a little difficult around the cuticles - you'll notice a pink area between sparkles and cuticle. 


These are the two colours I used for my simple mani.
China Glaze - Pink Voltage, Orly - Tiara

Application for this polish was fairly good. I used 3 coats to achieve full opacity. As with most CG's, the polish got a bit thicker and a little harder to work with after being open for a bit, but nothing that a cleanup didn't fix. Overall, this polish is very nice. I would love to use it on my toes! I must say though, I really do NOT like CG brushes! My favourites are the wide brushes with rounded ends, and the OPI ProWide brush. 

Tuesday, January 15, 2013

Today's Mani - Blue & Gold Leopard

Hey guys! So I finally got around to trying a leopard mani! The inspiration for the colours comes from @strawbrie on instagram. I was also happy to cross Sally Hansen's Pacific Blue off my untrieds list! 


These colours are: Sally Hansen - Pacific Blue, Nicole by OPI - The Next CEO, Rimmel - Black Satin 

When doing your nails more than one base colour, does anyone else forget that until they've painted all their nails one colour?! :( As I was painting my pinky I realized I forgot to leave the middle and ring fingers blank for gold... and as I was doing my right hand I only painted my middle finger blue before I remembered! I gotta fix this problem somehow so I don't have to always be restarting some nails and have them not a the same pace as the rest. 

Anyway, here are my nails pre-leopard and pre-cleanup: 


Here are my nails with the leopard dots, minus the outlines. Through watching many, manyyy, maannnyyyy tutorials on leopard manis, I've realized you don't need to have a TON of spots if you're gonna do them a decent size that's manageable to work with. If you're going for major leopard, then you can do them smaller and closer together but you'll need a much finer tool. I'll probably try this someday soon :) But for my nails the key is to have them spread out nicely and all different shapes, as you can see.


To create this look I used different size dotting tools. The biggest to create blue dots, and a medium one to create the black outlines and other random dots. When doing the outline, be as freeform as you like. It looks so much better when it's not all perfect, that's the point! Lopsided outlines are great, and all different types too. You'll see for some of the dots I did two outlines (like brackets), some are disproportionate brackets (one way bigger than the other), and some are almost completely outlined. 

Then in spaces where there's a big gap, fill it in with a blob the same colour as your outline. Do NOT overcrowd the empty spaces with the random blobs, you'll ruin the print! 

The only thing I wish I could change about my leopard print is the size of the outline. It's thicker than I'd like, although I still think it looks really good. I'm so proud of myself for doing this great of a job on my first attempt at a leopard print mani! (P.S. Sorry for my SUPER dry cuticles, I haven't been tending to them as often as I need to, and I took this picture after my first topcoat - I applied two - so I'll be using my Pro FX Apricot Cuticle Oil right after I post this!) 


Happy painting girls! Comment below with a link if you've got a leopard mani you'd like me to see :)

Tuesday, January 08, 2013

Cuticle Care

I just thought I'd share my cuticle routine with you! I never used to care about my cuticles until a couple years ago, but I only really started getting serious about them 6 months ago. Since then I've noticed they're a lot healthier and happier! 

The first cuticle product I ever used was Burt's Bees Cuticle Cream. It's semi expensive for a little jar but it lasts a long time because it's very compressed. It's got a lovely lemon scent too, which I love! Just use your fingers to rub some on your cuticles. You don't need an excessive amount just enough to moisturize. For best results do this 2-3 times daily. 


The Second product I used was Sally Hansen's Vitamin E Cuticle Oil. Now, I loved my Burt's Bees, but this stuff was amazing! Probably because it was made with vitamin e. For those who don't know, vitamin e helps with repairing scar tissue while providing moisture so that's why it's so good for your cuticles. Putting vitamin e on a wound that's starting to heal will help decrease the appearance of the scar later on! 
All sorts of vitamin e products can be purchased at a drugstore or even Walmart, such as pure vitamin e oil (a little expensive but totally worth it in my opinion), and Webber's Vitamin E gel and cream, which I own and have applied to my tattoos as recommended by my tattoo artist. 
I'd recommend vitamin e if you have really dry cuticles with a lot of hangnails. Mine tend to be dry, especially in this cold Canadian winter weather! 


My next product is Freeman's Bare Hands Cream. Not only do I love the scent of this mint & lavender cream, it reminds me of an Avon cream from when I was younger. It's hand and cuticle cream, so when I use it I make sure my cuticles get a nice moisturize too. 
I'd recommend this, or any other similar hand/cuticle cream if your cuticles are under control but you just want something to moisturize them nicely everyday. 


My last product is Pro FX Apricot Cuticle Oil. I haven't been using this for too long but it works like any other cuticle oil. I love the giant bottle though, so I know it's gonna last me FOREVER! My only disappointment is that it doesn't actually smell like apricot but it works great nonetheless. My friends also love it and made me apply it multiple times on them! 


As far as tools go, my favourite cuticle pusher is my own fingernails. I tend to do this when I'm bored (I always have) or only a little while before I know I'll be changing my manicure (so the gap between my cuticle and polish isn't massive). I do own a couple cuticle pushers, and I prefer metal over anything else, and I like a round edge. 

I've got a few different cuticle cutters, like scissors, the trimmers, and nail clippers of course. I find that the only tool to get close enough for my liking is the Sally Hansen Trimmer, but you've got to be extremely careful when you use it, I cannot stress that enough! Trimming cuticles too close could lead to an infection, and in some cases you actually need antibiotics, so let's just not go down that road. If your cuticles aren't long, you dont' even need to push them back. If you do want to push them back then just do that because they will settle down after pushed. Only cut them if necessary! 


So, we've talked about all the cuticle products I own, now for my actual routine. I push my cuticles once or twice a week so they're fairly small. I only need to trim them once every 1-2 months because I regularly push them. I do my cuticles first to get them out of the way of my mani. I only apply cuticle oil after I've finished the mani and put top coat on, or else the polish won't stick to the cuticle oil on your nail and your mani won't last as long (duh!). I apply my hand/cuticle cream maybe every few days, and I only use my Burt's Bees Cuticle Cream once in a while. This is mostly because it's in my purse and I forget about it since I'm typically at school with my backpack and don't often need to use my purse. 

I used to get a LOT of hangnails when I was younger and I would peel them and bleed and go to school with ugly bandaids :( I've learned since then though... NEVER EVER PEEL HANGNAILS! Don't touch them until you can cut them off! When you do cut them, use nail clippers and try to get as close to the base as you can then moisturize right away. I still get hangnails sometimes, but they're very tiny. I don't moisturize as often as I should so that's why they're drier than I want them. As long as you moisturize them after you push them, and you moisturize at least once daily then you should be set! Like I said, you only really need vitamin e as a remedial measure, although it is nice to have once in a while! One little secret I have is if you're out and don't have anything to moisturize them, I just use a bit of my lip chap (carmex exclusively) and rub it on my cuticles to make them happy! 

Hope this helped you if that's what you were looking for! Comment below and let me know what you guys do for your cuticles :)

Monday, January 07, 2013

2012 Favourites

Orly Nail Rescue
This stuff is AMAZING. I've only had it for about a week but I've used it probably five times... on myself and on my family. It's basically just a little bottle of nail glue with a brush for applying and a little jar of acrylic powder. Plus it comes with a small double sided file for smoothing after. 
My only concern is it takes a while to dry (though well worth it to fix cracked/ripped nails) and sometimes when you file it, little chunks come off because it hasn't stuck to the nail properly. Maybe I didn't let it dry long enough but this is pretty annoying since I hate sitting around waiting. 


Pro FX 
This brand sells oversized bottles of base coat and top coat, and they even have cuticle oil! When I say oversized I mean 75ml/2.5oz bottles of beautiful polish! The best part of Pro FX is how cheap it is... $5 at Walmart for a massive bottle that will last forever! They have 9 products, though I've only seen 8. They are: Complete 3 (base coat, strengthener, top coat), UV Top Coat, Quick Dry Top Coat, Mineral Botanical Strengthener, Epoxy Bond, Fiberized Ridge Filler, Protein Enriched Base Coat, Apricot Cuticle Oil, and Quick Dry Drops (haven't seen this - not sure where to get it). 
All of the Pro FX products work extremely well, and they do exactly what the label says it will. I'll be posting reviews on all Pro FX products sometime soon so stay tuned :)


Konad Multi Stamp 
The first Konad stamp I bought was just a small one and I thought it was great until I tried to get a certain stamp on a certain spot of the nail but couldn't line it up too well. Then I discovered there was a double sided stamp, and then saw the multi stamp. I love the multi stamp because it's double sided and has a scraper built in so there's less shuffling when stamping. 


Nail Polish Remover Dip
My mom introduced me to polish remover dip and I instantly loved it! Removing polish has never been easier with this baby. It's just a little jar with a sponge inside. The sponge has an x cut into it so you can put your finger in there, and it's soaked in nail polish remover so all you need to do is twist your finger back and forth until the polish comes off. Normally I use 100% acetone, which, if any of you know, is fairly sticky and a little annoying to work with at first, though it does remove polish faster. My friends prefer to use the dip, but I tend to only use it when I need to redo just one nail. I also use my old one to clean my dotting tools! 
My only complaint is that you have to buy a new one when the sponge gets full of nail polish, you can't clean it and add new nail polish remover. Trust me, I tried it and it did NOT work! They're really cheap though, like $3 at Walmart for a Sally Hansen one so well worth your money because they do last a long time and are super convenient. 


Sally Hansen Cuticle Pusher & Trimmer
I'm a huge fan of pushing my cuticles back, but I don't often have to trim them since they don't grow too long, but when I do, this tool cuts nice and close. I tend to push my cuticles back with my nails (my favourite method) but the pusher on this tool is pretty good, although I do prefer a metal one to this one. Mostly I just like the trimmer. The only thing is you need to be careful you don't cut too much cuticle off and bleed or cause an infection! My advice is try to cut smoothly and not too deep. 


***For the polishes below, I'm sorry I don't have swatches, I never bothered to take any pictures and that many swatches would be too time consuming considering I want to publish this post not sit around swatching! 

Color Club - Halo Hues Collection
My first holographic polish was Color Club's Harp On It. Originally I wanted the whole collection, and I had seen it on www.nailpolishcanada.com before but when I went to order more polish it was gone and most of the other polishes from the collection were sold out. A couple weeks later it was back up so I instantly ordered it! I'm glad I ordered the whole set because I broke my Harp On It after only using it twice, so I got a replacement with the Halo Hues collection. 
These holos don't need an aqua base unlike many other holos, which is definitely a plus since more nail polish = more money and more drying time. Every single colour in this collection is absolutely beautiful! The only thing I don't understand though is why they needed to have two pink(ish) colours. Cloud Nine and Halo-Graphic both have pink tones and in most lights I can't tell the difference. I haven't gotten a chance to swatch them yet, though in other peoples swatches I have been able to see a difference. 


UV Lamp 
Most UV lamps can be pricey so they're really only for dedicated nail polish folk, or if you've got the money. Since a UV lamp is primarily for gel and acrylic, it takes longer to dry actual polish which can be frustrating. While this is the case, I still use it on every manicure because it's faster than waiting for polish to air dry, and it warms my cold hands in the winter! I got mine on eBay for about $40 (36W) and I'm very happy with the quality - no complaints whatsoever!


Nicole by OPI - Sensational Scarlet
These dark red sparkles are beautiful for the holidays! The glitter is all different sizes and the fine glitter is very obvious in the light. Two coats is good for this polish, one is a little thin and  the glitter isn't as obvious. It's a little textured when dry, so I like to put a couple top coats on. 


Orly - Miss Conduct
I've only used this once but I was instantly in love with it. It's a deep raspberry colour with holographic sparkles. It's classy but still fun! You don't even need a top coat with this one, but it's probably better so your mani is sealed in. 


China Glaze - Flip Flop Fantasy
My absolute favourite summer colour! (And absolute favourite pink too!) I love this on both my nails and toes, in fact it's the only colour that I will ever match both nails and toes with. It's like a neon, but it's not. You need at least two coats for this one, sometimes even three but it's worth it! It dries a little matte so I always put a glossy top coat on. 


China Glaze - Rose Among Thorns
This colour really was a rose among thorns... I randomly saw it as I was looking for other polishes! This beautiful pink/red is a neon so a white base would probably be better though I've only used it on a clear base. 


Revlon - Guava
I love this pink, because it's bright yet it's a little deeper so it's fun but not tacky if that's what you're worried about at work etc. I use this a lot for designs, it's very opaque on top of darker colours. 


Orly - Cotton Candy
This pink is cute and girly, it's true to the colour in the bottle. So far I've only used it with some designs but it works well with most colours. 


Revlon - Lily
I'm not normally a fan of light purples, but I am of this one! It's absolutely gorgeous! I did a simple dot mani with this polish as the base and it was probably one of my favourite manis yet. 


WetnWild - On A Trip
If you're into bright purples, this one is a must have. It's extremely vibrant, and I think it pairs perfectly with Revlon's Guava (mentioned earlier). My only complaint is it dries a little darker than in the bottle, but still a lovely colour nonetheless. 


Nicole by OPI - Positive Energy
I've had this for so long, and I'm sure everyone's seen it, but I just love this metallic silver. I've never really used any other, so I don't have anything to compare it to. I've found that it is a little streaky though, but it's pretty good considering some metallics are just awful when it comes to streaking! 


Nicole by OPI - Look At Me, Look At Me
This is my favourite silver glitter. It's fine silver glitter, with some pink hex glitters. You can get away with one coat, but two is idea. It dries very textured so you'll probably want to apply two top coats. 


Nicole by OPI - The Next CEO
This one is a light metallic gold which looks silver in some lights. It's extremely classy and I would wear it on its own. It's also a great base for pink/purple leopard designs, and I love it with black accents, or as an accent on black nails! 


China Glaze - Secret Peri-wink-le
I love this periwinkle, it's not too dark or too light. It's definitely one of my must haves because it's so pretty! 


China Glaze - Aquadelic
I believe this one is similar to "For Audrey," also by CG. It's a deep mint/teal, and I absolutely love it, especially on toes or with Silver accents. 


OPI - Here Today... Aragon Tomorrow
This is a metallic dark green with a suede finish. I've had this for a while and only used it a couple times but every time I use it I just ask myself why I don't use it more often. It's very elegant, and it's a must have if you like dark colours with a bit of sparkle.