Showing posts with label nail polish addict. Show all posts

Sunday, February 03, 2013

Glitter Me Crazy!

Lately I've been really obsessed with glitter. There's a ton of different kinds of glitter; this can be really confusing. There's a ton of different shapes and sizes too. There's round, square, hex, bar, holographic, shimmer... the list goes on. I'm not really an expert at this in the least, so I'm not going to pretend to be. All I know is I love glitter! 


There's so much you can do with glitter. The most common thing is to just layer it over polish. I really like this if the two colours are similar or if the glitter is very very fine and it just adds a nice sparkle to the mani. You can also create a glitter gradient - a little time consuming, especially on your first try because it takes some practice before you figure out how to spread the glitter out so it makes a nice gradient. You can also use it to create designs, or go under another polish, or even make a jelly sandwich. The possibilities are endless! 

Here are a few of my favourite glitters! 


China Glaze - Nova 
This is a beautiful rainbow glitter polish, it's got two sizes of hex glitters suspended in a clear base. 

NOPI - Gone Wishin'
I love this purple and blue glitter, it adds a little extra dazzle to any polish! Suspended in a clear base. 

Sally Hansen - Rock 'n' Roll
This isn't a glitter as much as it is a translucent pink shimmer. I love adding this over top of any colour, it gives the base colour a whole new look! 

NOPI - Look At Me, Look At Me
I've enjoyed this every time I've used it. Who doesn't love a polish thick with nothing but glitter? It's about 90% silver glitter, 10% pink glitter. Almost opaque in one coat, but I always use two. 

Finger Paints - Art You Wondering?
This is my favourite polish to put on top of China Glaze - Turned Up Turquoise. The colours were meant for each other! Click here to see my blog post about them. Suspended in a clear base. 

Sally Hansen - Diamonds
This is extremely pretty on top of any colour, it just adds an extra bit of glam. Suspended in a clear base. (Sorry this photo looks really weird, didn't realize it until after :/) 

NOPI - Wear Something Spar-Kylie
Similar to Look At Me, Look At Me, this one is a solid pink glitter. Opaque in two coats. 

Sally Hansen - Bling-Tastic
I love the colour of this glitter! It's got tiny blue hex with bigger silver hex, suspended in a clear base. I like using this when doing nail art. 

Orly - Tiara
Silver hex suspended in a clear base. Very pretty when doing glitter gradients. 

Revlon - Sparkling
Large and tiny pink hex suspended in a milky pink base. I also love this one for glitter gradients! 

Deborah Lippmann - Mermaid's Dream
Tiny teal hex suspended in a teal shimmer base, with tiny rainbow hex and bigger blue hex. One of my absolute favourite polishes of all time; definitely makes me feel like a mermaid! 

NOPI - Fabulous Is My Middle Name
Silver, red, purple and black bar glitter, and tiny silver hex suspended in a clear base. What can I say, bar glitter, especially with those four colours mixed together, is stunning! 

China Glaze - It's A Trap-eze!
Small and large blue, green, yellow, silver, pink and orange hex suspended in a milky base. Everyone loves this one, and for good reason! So much colourful glitter packed into one bottle is simply breathtaking. 


Feel free to comment below and tell me some of your favourite glitters! 

Saturday, January 26, 2013

Pro FX Product Reviews

Ever since I decided to take a risk and try Pro FX products I fell in love with them, and I haven't been disappointed yet! These babies are a whole 75ml/2.5oz... MASSIVE! You'll never run out. Here's a bottle. I feel like it looks smaller in my hand than they look in real life, but maybe I'm just used to them! 


Pro FX has 9 products, but I believe only 8 are available in Canada. I've only heard of the 9th on a blog I came across while trying to search for a Pro FX website, sadly, this does not exist :( 
The Pro FX products are: Long Lasting UV Top Coat, Quick Dry Top Coat, Complete 3, Mineral Botanical Strengthener, Protein Enriched Base Coat, Epoxy Bond Base Coat, Fiberized Ridge Filler, Apricot Cuticle Oil, and Quick Dry Drops. This last one I have never seen in stores but I really really want it so if anyone in the USA is willing to get it for me I will graciously pay for it as well as shipping, and even send you some goodies! 

There are 3 amazing things about Pro FX which in fact cover the entire polish. What I mean is that the bottles are huge, the price is great, and the quality of the product is amazing so you are literally (at least in my opinion) getting a PERFECT product! I've already told you the bottles are 75ml/2.5oz, so let me just tell you how much they are and I'm sure you will all be jumping up to go grab them asap! Drumroll please... Pro FX products are ONLY $5!!! Based on price to volume, you won't find another product with this amazing value. On top of great value, the products do exactly what they are meant to do and they give long lasting results. Like I said, this is the perfect product! Let me put this into perspective... a 15ml bottle of seche vite top coat sells for around $10 USD, meaning a price of $66.67/100ml. Pro FX 75ml bottles sell for $5 USD, meaning a price of $6.67/100ml... Pro FX is a TENTH of the price of Seche and I've actually heard of some ladies who prefer Pro FX over Seche! 

*** The only downside to Pro FX is they aren't big 3 free :( Sorry to the ladies who don't use products that aren't, or who are allergic! 

Long Lasting UV Top Coat 
This is the last Pro FX I added to complete my collection. Initially I would have bought this one first but then I saw Complete 3 so I figured I would just get that since it's an all in one - more on that in a bit. I heard excellent reviews about the top coat before I finally got to use it, so you can imagine how excited I was to use it with epoxy bond... the result would be a mani lasting longer than 2 weeks! There's nothing else to really say, this top coat is wonderful, quality top coat, and a top coat is perhaps the most important part of a mani. 


Quick Dry Top Coat 
Like the name suggests, this top coat dries really fast! I didn't time it or anything but it is significantly faster than any normal top coat. The thing is though, after a few uses this one gets thicker, as is the case with most quick dries. I find this top coat doesn't smear designs underneath as much so I'll use a coat of this, then put my UV top coat on. I do typically like to do a couple top coats, I just find it seals the mani in better, makes for a smoother finish, and makes it extra shiny! I also use it when I'm in a rush because if the polish underneath is still a bit tacky, I can put this on, cure it for 2 minutes in my UV lamp and I'm good to go. 


Complete 3 
This is the first Pro FX product I ever purchased! It was great for me at the time because I could use the same product as a top coat, base coat, and strengthener. Although this polish isn't exclusively a strengthener, I did notice a difference in the strength of my nails after one use. My mom also owns this because I recommended it for her and she loves it! 


Mineral Botanical Strengthener 
Other than my Sally Hansen strengtheners, this is my only other strengthener. As the name suggests, it's got minerals, and botanical just means that it's natural and comes from plants so it's not like this is going to hurt your nails at all. Trust me, this strengthener is amazing. Again, my mom bought it after I recommended it to her and she's very happy with it because being a mom her hands are constantly in water and she just has really weak nails. This helps her and she loves her now strong nails. 


Protein Enriched Base Coat 
Half the reason I bought this was to complete my Pro FX collection. I obviously knew I would use it but I wasn't 100% sure what exactly it would do for me. Its full name is Protein Enriched Base Coat & Revitalizer. Pretty much, it's similar to a strengthener so it's for sort of weak nails that need a little bit more protein. Strengthener is for weak, thin nails. Protein is for nails that are prone to actual breaking or splitting. The first time I used this I instantly loved it. My nails were a tad yellow from having so much polish on, so when I took my mani off after having used this base coat, almost all the yellow was gone! I noticed a significant difference and I rotate between this, strengthener, and my epoxy bond for base coats and the result is unbelievable. My natural nails are beautiful. Yes, they're a bit brittle and prone to splitting, but that aside, they're not weak or yellow at all! This protein enriched base coat will make your nails healthier. 


Epoxy Bond Base Coat 
I came across this beauty of a base coat when searching for Pro FX reviews. At the time I only had complete 3 and strengthener so I wanted to know what other people thought of it. So many girls were going on and on about how amazing this was and how their manicure lasted forever! So I got it as soon as I could and I gave it a try right away! I left my polish on for a week with this base coat and there was very minimal chipping - only because of washing dishes all the time. 
Here's a picture from my Instagram. These are my nails after a week of heavy wear. All you ladies who regularly wash dishes you know what the water does to our handsi and nails! 
 I use this on my friends a lot, and if they don't get their polish changed this base coat EASILY makes a mani last two weeks! If you're looking for extremely long lasting manis, I suggest epoxy bond and the uv top coat, I promise you'll see amazing results! 


Fiberized Ridge Filler 
Like the protein enriched base coat, I pretty much only bought this to complete my Pro FX collection. I don't have big ridges, at least not big enough that a base coat + 2 coats of polish + 1-2 top coats won't cover so I didn't think I would actually be using this. I wanted to test it out one day so I put the protein base coat on, and this overtop because I had some craters in my nails from splitting. Let me tell you, this works wonderfully! Even if you don't have ridges I recommend this because it just makes your nail so much smoother to paint on. The only downside is it takes a while to dry, but it's totally worth it. If you're like me and your nails split a lot, just put a little bit thicker of a blob where the "crater" is and wait for it to completely dry and your nail will be smooth to perfection :) I find my toes have big ridges so I love using this on them because it covers all imperfections! 


Apricot Cuticle Oil 
This isn't the first cuticle oil I've used and it's not my favourite but I wanted to try it out and again, I got it to complete my collection. My favourite cuticle oil is Sally Hansen's Vitamin E cuticle oil. The reason I prefer that over the apricot is because it's vitamin e. My cuticles are constantly dry and it seems the only thing that can keep them moisturized and soft is vitamin e. I use the apricot cuticle oil on my friends and they love it! Like all Pro FX products it's a great value for a great price so I can't complain too much and when it's summer again I'll be using this as I won't need to moisturize as much. 


Here is my whole Pro FX army! They're lined up like this in my Helmer and I love seeing them all when I go to paint my nails! When I show people they ask what they are because I guess so many oversized bottles looks a little intimidating!


I recommend these products to anyone and everyone because they've given me such amazing results. For top coats, I still do want to try Seche Vite but I'm in no rush because I'm completely satisfied with the top coats I have. I haven't used my OPI top coat since I got Complete 3 about 8 months ago (Maybe I should!) As far as base coats go, I will never go back to anything else! I love the strengthener, protein base coat, and epoxy bond. I also like the ridge filler as a substitute to Orly's nail rescue and who could live without some cuticle oil in a massive bottle like that! This whole set only costed $40+tax and as a broke university student I really do love finding products that have a great value with reasonable prices!

Thursday, January 24, 2013

Deborah Lippmann - Mermaid's Dream

Lately I've been in a crappy/stressy mood so I figured swatching 1) an untried polish and 2) a fancy polish would de-stress me! Mermaid's Dreams by Deborah Lippmann happened to fall in both those categories so I figured I'd swatch it.

Before I even bought this polish I told everyone it was one of my favourites. I wasn't disappointed; this polish is absolutely gorgeous! The pictures do it no justice because I used my iPhone 4 camera, I was too lazy to get out my Canon Rebel T1i!

Here's Mermaid's Dream in the bottle. Who else loves the DL bottles?! They're so classy and elegant.


This is after 3 coats, no top coat. I find the polish to be very thin so 1 coat is definitely not enough, 2 coats was almost enough but there were still a few bald spots although they were not noticeable unless you stared, so 3 coats was just perfect to achieve opacity. It dries a bit textured which is okay for some, but I don't really like textured nails, and I find stuff gets caught or snags on it. 


Here's it is again with two top coats - sorry for the glare! There's still a tiny bit of texture, so I'll be applying a 3rd top coat tomorrow when I get my Pro FX UV Top Coat! For the two top coats pictured I used my Pro FX Quick Dry since I did this before bed and didn't wanna see ugly smudges when I woke up.


Ughhh sorry for my terrible cuticles :( They don't even look as bad in person as they do in this picture! I attempted to get a macro shot of the polish so you could see what's going on here... I did not succeed, clearly! There's all different sizes of the teal glitter, some bigger silver pieces of glitter, and of course the big blue pieces of hex glitter. This polish is just jam packed! Everything works so well together which makes for an absolutely stunning polish.


And one last picture of my whole hand, again, sorry for the glare, that top coat sure is shiny!


Overall, I LOVE this polish. The colour is breathtaking and anyone who purchases it won't be disappointed. Application was good - not bad at all, but definitely not the best. Probably because it's intense glitter, the actual polish is thin (not the formula) and because of the DL brush. The brushes aren't terrible or anything, but I prefer a pro-wide OPI brush, just my personal preference. Glitter placement was probably one of the easiest I've had. There's definitely a good amount of blue hex in this polish; I knew this would be fine since I've seen so many swatches. 

Would I recommend this polish to EVERYONE?! Umm, YES! I know DL's are a bit pricey but this one is absolutely gorgeous! Besides, every girl needs a few expensive polishes to use when she wants to feel extra glamorous or to cheer her up when she's feeling down :) 

Friday, January 18, 2013

A Relaxing Friday Night

I'm being totally lame tonight and didn't wanna go to "country night" at the bar with my friends. I like going out but... country night isn't really my thing. Not because I don't like country music, because I don't know any of the songs! 

So, I chose 8 untried polishes to swatch! My New Year's Resolution is to try all my untrieds... I'm sure many of you also have this resolution LOL! You'll have to excuse my deformed middle fingernail :( It broke last night! Also, there's no topcoat on any of these swatches, I wanted you guys to see the true finishes because we all know what shiny looks like! One last thing, I did no tidy up on these swatches (sorry some of them are brutal) and I sincerely apologize for my AWFUL cuticles... they're extremely dry and need some tending to asap :( 

The first polish I've got to show you is China Glaze - Peachy Keen. I got it about 6 months ago with a bunch of other CG colours - mostly neon/bright ones. I absolutely love peachy colours so I was really excited to try this one. It applied very well, a little bit see through on the first coat but perfectly opaque on the second coat. My only complaint is that the colour in the bottle is more of a peach, whereas the swatched colour looks more like a coral. It's still pretty, just not completely true to the bottle colour. 


Next up I've got Finger Paints - Fall-ing For You. I randomly got this one from Sally's because it was on sale for $2 - what a deal! Like most metallics, some streaks are visible but they aren't too bad. No problems with application. I didn't think I would like this colour as much as I do, since I normally don't like dark colours, and I like blue but I prefer pink. But having said that, I LOVE this polish! I'll be experimenting putting sparkles over it soon - the sparkles are fine silver sparkles with blue hex :) This polish was opaque on the first coat, but I've done two for the picture.  


Now we have Orly - Synchro. It's a beautiful light duo chrome, I also got it at Sally's for $2! Gotta love those sales! I wasn't sure how translucent it would be, so my first and ring fingers have white base coats but as you see it makes no difference, as this polish is opaque in two coats. No problems with application. It's a nice rosy pink/red, I really like it :) 


This polish is Sinful Colors - Lets Meet. I was super excited to try this one, because it's my first and only SC. I'm not really a huge fan of yellow to begin with so I didn't have any expectations for this polish. My first and ring fingers have white base coats, and middle and pinky have only a clear base coat. Application was fine, but this polish is extremely translucent. All nails have two coats, and as you can see there are still patchy parts. It's a nice shimmery yellow, but I don't think I'll be using it very often. If anything, it'll be a base for a design, possibly a saran wrap mani, maybe even a half moon mani. 


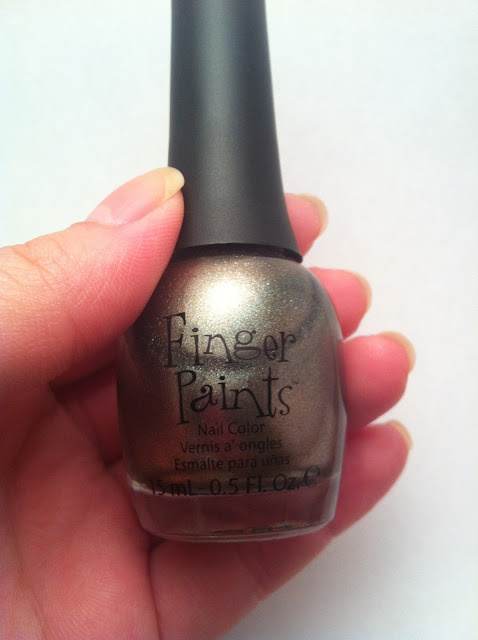
Next up is Finger Paints - Take It or Leaf It. It's like a darker version of CG Swing Baby, which is a darker version of NOPI The Next CEO. I've gotta say, I LOVE all three! I didn't think I would really like the FP one as much but man I think I'm in love! I do enjoy a dark polish every now and then, I think they're rather classy and elegant and that's what this polish is, but it's still fun cause it's metallic! Also, I really don't like gold... jewellery that is. But there's just something about a beautiful gold nail polish! Like most FP, application was great and this colour, like Fall-ing For You, was opaque in one coat, but I've done two coats for the picture. 


This one is Nina - Pearly Brights. I'm not sure if that's the actual name, or it's the collection because this colour is pearly and bright... but that was the only thing written on the bottom of the bottle. This colour is absolutely gorgeous! It looks oddly pink in the picture but it's more of a coral/pink/pearl in real life. This colour is pretty up there with the colour of CG Flip Flop Fantasy... I love how bright it is. It's neon but doesn't need a white base which is awesome! Like most neons/brights, it dries semi matte. The absolute WORST part of the polish though... THE BRUSH IS TERRIBLE! I should have taken a picture of it because it was just awful. Maybe some of you like the Nina brushes, or maybe I just got a terribly cut one... but it's awful. It's way too wide (like the width of my pinky!) and one side was rounded but the other wasn't so it was a square! Umm talk about annoying... The application was okay even though the brush wasn't, and the polish was opaque in two coats. 


Next is Revlon - Minted. The first time I saw this colour was on @higasaurus's instagram. I had a couple other mints but something about this one just stood out to me and I knew I HAD to have it. Revlon did another mint, very similar, called Jaded. I almost bought it but I'm glad I didn't because I was holding out for Minted! I think what sets this mint apart from other mints is that it's got more of a green tinge. Yes, I know mint is supposed to be green, but it's usually a lot whiter and softer. Application was great, this polish became opaque in two coats. The formula was a little on the thick side though but it's still very easy to work with. My only complaint is with Revlon brushes, they're rather skinny so it's a little annoying cause I like brushes like OPI's where I can polish a nail in 3 sweeps. With Revlon it's about 5 sweeps. This gorgeous colour makes up for the sucky brush though! 


This last one is Revlon - Whimsical, over Minted. I've been seeing lots of people talk about this polish on instagram, as well as Girly. I bought them at the same time and I finally got around to using Girly yesterday on my friend over Revlon's Lily which is a beautiful light purple. Girly was very pretty, I'm going to try it over pink next. Like Girly, Whimsical is stunning in the bottle. However, when applied, the glitter is very sparse and placing it is frustrating. There are two coats of Whimsical pictured below, but that's after extensive glitter placement. I might try it over a ligher mint again, because like I said Minted is just greener than most mints so it altered the colour of Whimsical a bit, I think it looks a little odd with the glitter but it's still pretty. I'm not completely sold on this polish. I think I'll need to experiment with it on top of different colours, or even in a jelly sandwich before I can make up my mind about it. 


If you're reading this, thanks for sticking with me through my first swatching session! I had a lot of fun swatching, because I got to see lots of new colours that I haven't before, and I even fell in love with a couple new ones! I've still got a ton of untrieds which I'm slowly getting around to using... and I have more polish on its way so that means even more swatching! I think this was a great way to end the week, I've been a little stressed lately but somehow polish always seems to relax me. I realize how sad that is... and that I'm rambling... so have a great weekend ladies! 

Tuesday, January 15, 2013

Today's Mani - Blue & Gold Leopard

Hey guys! So I finally got around to trying a leopard mani! The inspiration for the colours comes from @strawbrie on instagram. I was also happy to cross Sally Hansen's Pacific Blue off my untrieds list! 


These colours are: Sally Hansen - Pacific Blue, Nicole by OPI - The Next CEO, Rimmel - Black Satin 

When doing your nails more than one base colour, does anyone else forget that until they've painted all their nails one colour?! :( As I was painting my pinky I realized I forgot to leave the middle and ring fingers blank for gold... and as I was doing my right hand I only painted my middle finger blue before I remembered! I gotta fix this problem somehow so I don't have to always be restarting some nails and have them not a the same pace as the rest. 

Anyway, here are my nails pre-leopard and pre-cleanup: 


Here are my nails with the leopard dots, minus the outlines. Through watching many, manyyy, maannnyyyy tutorials on leopard manis, I've realized you don't need to have a TON of spots if you're gonna do them a decent size that's manageable to work with. If you're going for major leopard, then you can do them smaller and closer together but you'll need a much finer tool. I'll probably try this someday soon :) But for my nails the key is to have them spread out nicely and all different shapes, as you can see.


To create this look I used different size dotting tools. The biggest to create blue dots, and a medium one to create the black outlines and other random dots. When doing the outline, be as freeform as you like. It looks so much better when it's not all perfect, that's the point! Lopsided outlines are great, and all different types too. You'll see for some of the dots I did two outlines (like brackets), some are disproportionate brackets (one way bigger than the other), and some are almost completely outlined. 

Then in spaces where there's a big gap, fill it in with a blob the same colour as your outline. Do NOT overcrowd the empty spaces with the random blobs, you'll ruin the print! 

The only thing I wish I could change about my leopard print is the size of the outline. It's thicker than I'd like, although I still think it looks really good. I'm so proud of myself for doing this great of a job on my first attempt at a leopard print mani! (P.S. Sorry for my SUPER dry cuticles, I haven't been tending to them as often as I need to, and I took this picture after my first topcoat - I applied two - so I'll be using my Pro FX Apricot Cuticle Oil right after I post this!) 


Happy painting girls! Comment below with a link if you've got a leopard mani you'd like me to see :)