Showing posts with label nail polish. Show all posts

Saturday, March 23, 2013

Quo by Orly - Prepster


I just wanted to do a really quick review on a new polish my mom bought me because I LOVE it! Lately I've really been going crazy for all sorts of blue polishes, and I didn't even think I liked blue! Apparently I do... This one caught my eye when I went into Shoppers Drug Mart. There were a couple other Quo polishes I liked but this one was absolutely gorgeous! Quo makes their own makeup but for their polish, it's by Orly. 

I do love Orly polishes and the formula and application was typical Orly. My only concern was the brush. It was cut evenly but at least 3 bristles came out as I was applying this polish! Talk about annoying! Like I said the formula and application were good. This polish is a little on the sheer side so it took 3 coats + an extra tip coat and you can still see some VNL. I don't really mind, because for the most part it's opaque, you only see the VNL in some lighting. 

The main reason I love this polish is because it's so unique. It stood out to me the first time I saw it but I fell even more in love with it when I put it on. This polish is so unique because it's a totally different colour depending on the lighting, and it photographs differently than it looks as well! I wish I could have gotten a couple pictures in my light box but I never got around to it. Sometimes this polish looks really dull and minty. Sometimes it looks teal - someone even told me it looks like a Tiffany blue. And sometimes it's just really bright blue. There's also a subtle shimmer in this polish which just makes it even prettier! It's so subtle and I wasn't sure I liked it at first but this polish wouldn't be the same without it. 

On top of being a pretty colour it's perfect for spring! Very light yet still fairly bold. As previously mentioned my only concern with this polish is the brush, but I think I just got a bad one. I'd like to try layering this polish over white & black to see how it looks! 

XO Natasha 

Saturday, February 16, 2013

Untrieds: China Glaze - White Cap


For this look I used a super dark purple base, Avon - Midnight Plum, and layered China Glaze - White Cap over top.  White Cap is a very translucent shimmery white base with lots of iridescent gold glitter in it. I didn't realize how much gold was actually in White Cap until I put it on, and I don't really like gold so I don't really like this colour combo. I'm sure some would, just not me. (Doesn't it look a little green to you?) Application was smooth, formula was thin so it was great to work with. When dry this polish is slightly textured but two top coats will cover it. I'd like to try White Cap over a white of slightly off white base next time. It would also be great as a subtle accent. (PS I didn't cap my nails that's why it looks like there's tonsss of tip wear!)


Manicures for Friends!


My friends are pretty damn lucky that they have me to constantly keep their nails pretty... 

I did this for one of my friends. She LOVES glitter and couldn't stop staring at her nails! I used her silver CND Shellac polish as the base and put China Glaze - Nova on top. It worked well for a couple days... but since polish and shellac don't really work together too well it peeled a bit on a couple fingers. Nova was great to work with at first but like all heavy glitter polishes, it got super thick fairly quick.


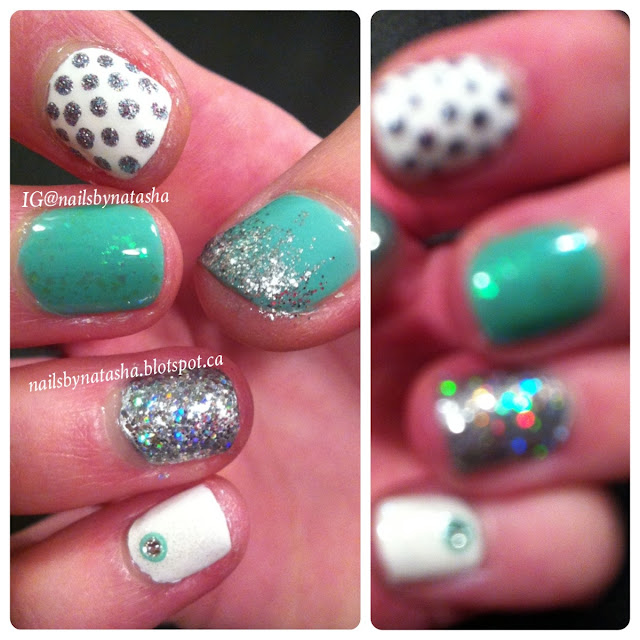
This was done for my other friend. It's a nice way to jazz up a plain skittle mani! The teal colour used was Essie - Turquoise & Caicos. I used this for the thumb and middle finger, and dot on the pinky. The white on the first finger and pinky is a random brand from a random store. It has great coverage which I really like cause that's sometimes hard to find with whites! The base on the ring finger is NOPI - Positive Energy. For the thumb, the glitter gradient was created using Orly - Tiara. The dots on the pointer finger are NOPI - Look At Me, Look At Me. On the middle finger, there's some subtle holographic flakies, Zoya - Opal. The glitter on the ring finger is CG - Nova, I used two coats. The dot on the pinky, like I said, was the Essie polish, and then I placed a 1.5mm rhinestone (purchased on eBay) in the centre.

Sunday, February 10, 2013

Indie Polish: Forever Polished

Okay I'm becoming quite obsessed with indie polishes lately... I think it's absolutely amazing how so many laides have put so much time into creating gorgeous colours and combinations of glitter! 

Ashley's indie brand is called Forever Polished, and her polishes can be purchased through her Etsy shop. Also check out her Instagram

The two polishes I chose were Blue Smoke and Minty. Minty is now done but she's got some other holographic polishes which are also gorgeous! 


This first one is Blue Smoke. I'm not the biggest fan of blue but lately I've been kind of obsessed with really dark blues. Throw in some holographic glitter and I'm even more obsessed! The holo in this polish is nonlinear so it's a more subtle effect but the effect is still so pretty. This polish is WAY more breathtaking in person than it is in any of my pictures! Application was very good. You could get away with one semi thick coat of this, but I did two thin coats for perfect opacity. The polish got a bit thick after the first coat but it was still really easy to apply.


With flash:


This one is Minty. I've always loved mint polishes (I have way more than I thought I did!) so this polish was a nice addition to my collection. I love how the nonlinear holographic glitter is very subtle but still noticeable up close. Minty has less holo than Blue Smoke, and I prefer that since mint is a lighter colour than a bold dark blue. Application was good, I used two thin coats with no undies for the pictures below, but three coats would be ideal if you're using this polish on its own. Like Blue Smoke, this polish got a bit thicker after the first coat but I found this formula to be a bit thinner than Blue Smoke. The pictures make it look more see through than it actually is IRL. I don't find this shade of mint to be the most complementary with my skin tone but some undies with this as top coat might look better, but I still loved this polish.


This is only the second indie polish brand I've purchased and I'm very satisfied :) of the two polishes I got, I like Blue Smoke the best, but I still love both of them! Ashley also makes awesome soaps which are for sale in her Etsy shop! 

Thursday, February 07, 2013

NOTD: Flat Half Moons

So I just wanted to do a simple mani and use these two colours together since I tried to for my water marble but it didn't work out... Kaitlin from The Daily Polish was my inspiration! She did a "flat" half moon mani and I thought it looked really cool. It's a nice twist on the classic half moon mani, and I figured since my nails are round, a straight horizontal line would look cool. 

It's definitely different, but I think it suits square tips much better than round tips. I apologize for my messed up first finger, I was getting restless while waiting for the polish to dry and bumped it :( 


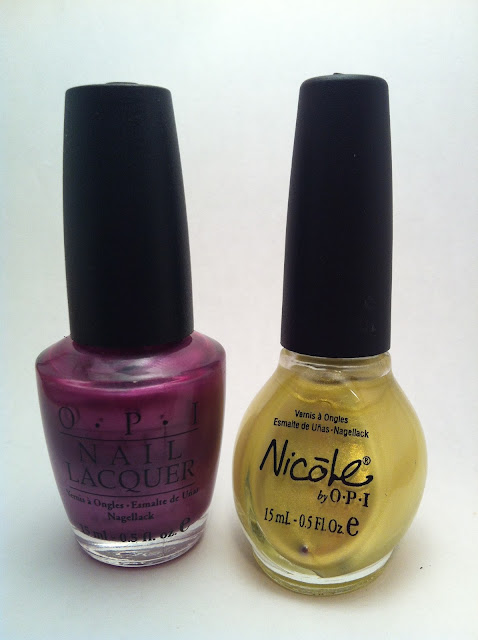
Here are the colours I used: OPI - 3 Plums, I Win! and NOPI - Lemon-Lime Twist. I've had them both for about 4 years and I barely use them, and I thought they looked really nice together! 


Monday, February 04, 2013

Indie Polish: Tryst Lacquers

Hey guys! I'm SO excited to tell you all about Tryst Lacquers, made by the lovely Kimberly Maranan! Visit her etsy shop here, and check out her facebook page! Not only are the three polishes I bought from her absolutely GORGEOUS, but they're also my very first indies! Kimberly is from Canada like me hehehe and I love supporting indie polish makers but I especially love supporting those from my own country! 

The three colours I got are: High School Sweetheart, Sweet Nothings, and What A Girl Wants. 

This is High School Sweetheart. It's a lovely white base with large pink hex, and smaller pink, magenta, and red hex. It's also got some tiny silver square glitters as well! I'm absolutely in LOVE with this polish, I'm wearing it right now! In fact, I will be wearing it for the next few days because it's just so pretty. 
Application was great, I had no difficulties placing the glitter. In the pictures below I've got two thin coats with no undies! Three thin coats would have given a bit more coverage but I'm totally okay with how this looks. There's just something so classy and elegant about white nails, but put some  girly glitter in it and your nails look fab! 


And here it is in the bottle:


Next I've got Sweet Nothings and What A Girl Wants. Sweet nothings is on my first and ring fingers, What A Girl Wants is on my middle and pinky fingers. Undies: Orly - First Kiss, Orly - Decoded.
Application was also very nice. Absolutely no difficulties with placing glitter like most glitter polishes. Photographed below are two coats of undies and two coats of glitter polish on top.

Sweet Nothings has a clear base with large copper hex, smaller magenta and dark blue hex, and tiny silver square glitter.


What A Girl Wants has a clear base with large pink and blue hex, medium lighter pink hex, and small and tiny periwinkle hex. I love love love this one because it's so girly!


Here are Sweet Nothings and What A Girl Wants in their bottles.


Anddd I tried to do a jelly sandwich but I shouldn't have used such a shimmery polish. I'll be using a nude next time! Even though this didn't turn out too well, I love these glitters for jelly sandwiches! The different sizes of glitters go really well together and I love how the polishes are dominantly one colour but they've got contrasting big hex glitters in them that your eyes are just drawn to!


Once again, thank you Kimberly! These polishes are amazing and I will definitely be buying some more Tryst Lacquers soon! 

Sunday, February 03, 2013

Glitter Me Crazy!

Lately I've been really obsessed with glitter. There's a ton of different kinds of glitter; this can be really confusing. There's a ton of different shapes and sizes too. There's round, square, hex, bar, holographic, shimmer... the list goes on. I'm not really an expert at this in the least, so I'm not going to pretend to be. All I know is I love glitter! 


There's so much you can do with glitter. The most common thing is to just layer it over polish. I really like this if the two colours are similar or if the glitter is very very fine and it just adds a nice sparkle to the mani. You can also create a glitter gradient - a little time consuming, especially on your first try because it takes some practice before you figure out how to spread the glitter out so it makes a nice gradient. You can also use it to create designs, or go under another polish, or even make a jelly sandwich. The possibilities are endless! 

Here are a few of my favourite glitters! 


China Glaze - Nova 
This is a beautiful rainbow glitter polish, it's got two sizes of hex glitters suspended in a clear base. 

NOPI - Gone Wishin'
I love this purple and blue glitter, it adds a little extra dazzle to any polish! Suspended in a clear base. 

Sally Hansen - Rock 'n' Roll
This isn't a glitter as much as it is a translucent pink shimmer. I love adding this over top of any colour, it gives the base colour a whole new look! 

NOPI - Look At Me, Look At Me
I've enjoyed this every time I've used it. Who doesn't love a polish thick with nothing but glitter? It's about 90% silver glitter, 10% pink glitter. Almost opaque in one coat, but I always use two. 

Finger Paints - Art You Wondering?
This is my favourite polish to put on top of China Glaze - Turned Up Turquoise. The colours were meant for each other! Click here to see my blog post about them. Suspended in a clear base. 

Sally Hansen - Diamonds
This is extremely pretty on top of any colour, it just adds an extra bit of glam. Suspended in a clear base. (Sorry this photo looks really weird, didn't realize it until after :/) 

NOPI - Wear Something Spar-Kylie
Similar to Look At Me, Look At Me, this one is a solid pink glitter. Opaque in two coats. 

Sally Hansen - Bling-Tastic
I love the colour of this glitter! It's got tiny blue hex with bigger silver hex, suspended in a clear base. I like using this when doing nail art. 

Orly - Tiara
Silver hex suspended in a clear base. Very pretty when doing glitter gradients. 

Revlon - Sparkling
Large and tiny pink hex suspended in a milky pink base. I also love this one for glitter gradients! 

Deborah Lippmann - Mermaid's Dream
Tiny teal hex suspended in a teal shimmer base, with tiny rainbow hex and bigger blue hex. One of my absolute favourite polishes of all time; definitely makes me feel like a mermaid! 

NOPI - Fabulous Is My Middle Name
Silver, red, purple and black bar glitter, and tiny silver hex suspended in a clear base. What can I say, bar glitter, especially with those four colours mixed together, is stunning! 

China Glaze - It's A Trap-eze!
Small and large blue, green, yellow, silver, pink and orange hex suspended in a milky base. Everyone loves this one, and for good reason! So much colourful glitter packed into one bottle is simply breathtaking. 


Feel free to comment below and tell me some of your favourite glitters!