Showing posts with label dotting tool. Show all posts

Thursday, August 22, 2013

Nail Art August Day 8: Ombré

As always, I try and do something a little different than the general population when it comes to these nail art challenges, so today I did a polka dot ombré. There's a lot of debate when it comes to the difference between a gradient and ombre but to me a gradient is when two colours fade together on one nail and an ombré is when the colour goes from light to dark (or vice versa) and each nail is one solid colour. 


As soon as I saw ombré, I knew this is what I wanted to do. I love silver and purple together! 
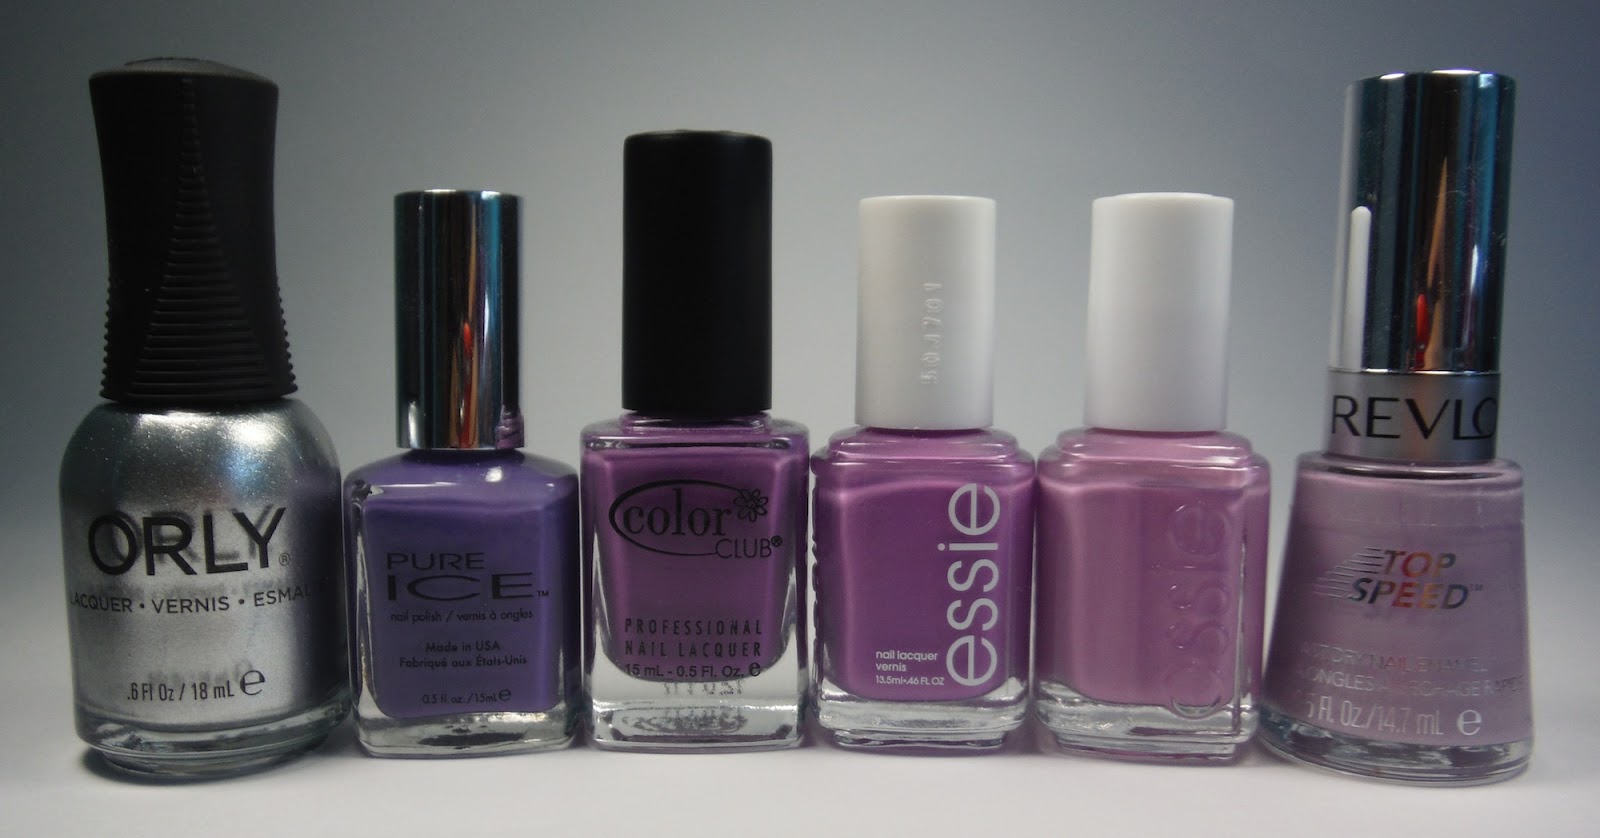

Orly - Dazzle, Pure Ice - Jailbait, Color Club - Lavendarling,
Essie - Playdate, Essie - Under Where?, Revlon - Lily


I think these colours go really well together for the ombré. If you don't have a lot of polishes it's sometimes hard to get a perfect ombré but luckily most of my purples are similar so this worked out nicely! I don't think I'd be able to do an ombré with any other colour. Blue maybe, but it would be a little rougher than the purple. 

This mani also gave me a chance to practice my polka dots. I don't do them often because I never used to like them - I'm starting to now though! I was kinda shaky the day I did this mani and I know I could have done a better job, but looking at this mani as a whole I'm really pleased with how it turned out. This was also my first time using my new silver, Orly - Dazzle. It's a foil whereas my other silver (NOPI - Positive Energy) is a metallic. 

XO Natasha 

Friday, August 16, 2013

Nail Art August Day 6: Animal Print

Up until now the only real animal print I ever did was leopard. I tried giraffe on my sister once but it didn't turn out as well as I hoped, though it still looked neat. (It actually kind of looked like a dinosaur egg!) Since these nail art challenges are meant to push you out of your comfort zone and try things you maybe never would otherwise, I wanted to attempt all different kinds. 


I would do leopard on one nail of course, but I also wanted to do giraffe and zebra. I needed one more for the last nail and I saw someone did cow spots so that was my inspiration. On my practice fingers I did zebra about 5 times, giraffe once and cow once. I did my nails and I was really happy with them but I knew there had to be something I could do on my thumb... tiger print! I practiced on the finger again and liked it a lot. 

After one day of staring at the cow print I didn't like it because it didn't really match the rest of the prints. I searched cheetah but it's just plain dots. I decided to do a bunch of little c's. I've seen some people do this design for leopard but without the coloured spots inside it's not actually leopard, and I know it's not cheetah but that's what I'm calling it!

For these nails I really wanted to keep the colours as close as possible to the real animals so there was no doubt at all which print was which. 

OPI - A Good Mandarin is Hard to find, NOPI - The Next CEO, Orly - Buried Alive,
Zoya - Piaf, Joe - Mocha, Zoya - Jacqueline 


I really want to do a crocodile/alligator print someday. I tried it on a practice finger but it didn't turn out at all. A green print would look really cool since most of the colours are browns/blacks/whites. 

I'm very pleased with how this mani turned out and I have a feeling my friends are going to request it once they see it! I'd also like to maybe try doing these nails with funky colours, although the giraffe might look a little odd. I think the tiger, leopard, zebra and cheetah would still be pretty distinguishable though :) 

XO Natasha 

Tuesday, August 13, 2013

Nail Art August Day 5: Cutsey

Alright so when I think of "cutsey" I think of bows. I really wanted to add bows on this mani but I'm awful at drawing them with dotting tools. I have a stamping plate that has a bow on it but I'm no good at placement so it would have turned out messy (I practiced about 1o times and still decided against it!) I still think this mani is really cute the way it is and I'm happy with how it turned out :) 

I began by using binder reinforcements to create half moons. The green/mint polish is Essie - First Timer. This was an untried, and I love it! It dries a little different than the bottle colour, though. It's a little darker and a little more green when dry. 

I used dotting tools for the dots, obviously, and I used a thin brush for the stripes. I'm not happy with my middle finger stripes. I usually begin on my thumb (because you can barely see it so it doesn't matter if I mess up) but for whatever reason I forgot and started on my middle finger. By the time I got to my pinky the stripes were perfect though! 


Here's my mani with the bottle. I'm not sure if you can see the polish colour difference in the bottle vs on my nails. It's very slight.


I never really used to like dots but I'm starting to after this mani and one I did a while ago, my summer floral nails. I've always loved stripes and I'm glad I'm getting better at freehanding them with a brush, it's so much faster than tape!

XO Natasha 

Wednesday, August 07, 2013

Nail Art August Day 3: Character

As soon as I saw today's nail art challenge was "character" I knew exactly what I wanted to do! MINIONS! They are one of my absolute favourite characters. I was recently at Universal Studios in Orlando, Florida and let me just tell you... it was minion heaven! 


I've seen a lot of amazing minion nails so if you're looking to do minion nails on yourself there's a ton of inspiration out there. I try to plan out my nail art as much as possible on paper before I actually start on my nails so I have some sort of idea what to do. One thing I don't do that I should start is doing test runs on my practice fingers, after all that's what they're for! 

Here are all the polishes I used for this mani: 


Sally Hansen - Mellow Yellow, OPI - Suzi Says Feng Shui, Orly - Dazzle,
Beauty Treats - White, Joe - Mocha, Rimmel - Black Satin 

I started with three coats of yellow. I used striping tape to section off the bottom part for overalls then I used dotting tools to create the straps of the overalls. I did silver dots for the goggles, added black straps on the sides, then did the eyes - white dots with brown for the iris and black pupils (but I'm not sure if you can tell I did black pupils in the pictures). I added little G's (for Gru) on the overalls and did black mouths. I used dotting tools for everything except the hair - for that I used a fine brush. I wanted to do teeth and a tongue but I was afraid I would mess it up so I kept the mouths simple.


Aren't minions just the cutest things ever?! When I did these nails I hadn't seen Despicable Me 2 yet but I knew there were evil purple minions... Well I just watched it last night and I think they would be hilarious on my nails! 

XO Natasha 

Sunday, August 04, 2013

Nail Art August Day 2: Re-Creation

Today's nail art challenge is to do a re-creation. I wasn't sure if it was supposed to be of your own manicures or someone else's, I guess the option is up to you, but I chose to re-create one of my own. 


I think tuxedo nails are so cute, and they were one of the first designs I ever did! This was before I had dotting tools, so I used a toothpick. The polishes I used were Pure Ice - China Girl (pink) and NOPI - Positive Energy (silver). I freehanded the tips and used dotting tools for the buttons and bows. 


Although this mani basically looks the same, I do think it's a little better. I now clean up my manis for a start. Also, in the original picture I didn't put top coat on because I was waiting for the polish to dry and had to leave before I got the chance, now I would never dream of not putting a top coat on! I also take a lot better care of my nails and cuticles, and my use of dotting tools is a lot smoother. 

Bows are one thing I haven't quite yet mastered. I'm also not a big fan of combining two chromes. 

XO Natasha 

Sunday, June 23, 2013

Summer Floral

I've really been into floral lately, but I haven't actually gotten around to doing floral nail art. It all just looks so beautiful but a little more time consuming than I wanted. But, I figured I would do it because my last mani was meant to be a palette cleanser. 

I started with a base coat of Nail Envy, of course. Then I decided to use one of my new polishes, Essie - Tart Deco. It's a beautiful peachy coral creme. I got it at Shoppers Drug Mart for $6.99, yay for sales! (Essie is usually $11.99 at the drug store and $9.99 at Walmart.) Tart Deco dried a little darker than in the bottle but I still love it. I decided to do purple flowers because I think they look great with peachy colours. I used white for my lines and dots because, well, isn't that the classic floral mani? 

Essie - Tart Deco, unnamed Love & Beauty, Essie - Playdate, Beauty Treats - White, Zoya - Midori 

I used a dotting tool for the dots, and a thin brush I bought on eBay for the stripes. 


For the flowers I used a few different sized dotting tools. To see a video tutorial on this flower technique I learned from trendypolish on Instagram, click here. Her flowers are a little bigger than mine, and so are the leaves. These flowers are so easy and pretty, you have to give them a try if you love floral :) 


After seeing how easy floral really is, I'm definitely going to be trying a lot more of it! 

XO Natasha 

Friday, March 29, 2013

Easter Nails

I was so so so excited to finally be able to do Easter nails! I didn't really do anything for New Years or Valentine's Day, and I don't like green so although my St. Patrick's Day nails were pretty cool I took them off the next day. 

When I think of Easter I think of mini eggs! I love how pastels look together so I knew I could do something really pretty. Since filing my nails into almonds I've come to realize it's an awful shape for a LOT of designs. Lines or anything geometrical especially. It's really annoying :( BUT... they are the PERFECT SHAPE FOR EASTER EGGS! So naturally that's what I had to do. I really wanted a random assortment of egg designs and colours, so I picked 5 Easter colours and planned out my eggs on paper. 

I really love how my Easter eggs turned out. Each one is a different colour, with a different pattern of lines, zigzags and dots. These nails look even cooler from far away! Well, when I stick my hands out and admire them. 


Polishes used:
Blue: Orly - Snowcone, Yellow: Sally Hansen - Mellow Yellow, Purple: Essie - Playdate, Turquoise: China Glaze - Aquadelic, Pink: Orly - Cotton Candy


After I planned out my Easter eggs I saw a picture of little chicks in eggs! I thought that was adorable so I decided I'd do it on my right hand. I also love how these turned out! They're so cute! I don't have many yellow polishes so I was a little worried the chicks would look a little odd but the yellow I used dried darker and it ended up looking even better than in the bottle. I forgot to bring black and orange polishes to my mom's so thankfully her and my sister had some! 

Polishes used: 
Yellow: Sally Hansen - Lightening, Black: Wet 'n' Wild - Black, Orange: NYC - 112A (don't know the name) 


To create all the designs I used my dotting tools. I put two coats of Seche Vite on because the designs made my nails a bit bumpy. 

XO Natasha 

Saturday, February 16, 2013

Manicures for Friends!


My friends are pretty damn lucky that they have me to constantly keep their nails pretty... 

I did this for one of my friends. She LOVES glitter and couldn't stop staring at her nails! I used her silver CND Shellac polish as the base and put China Glaze - Nova on top. It worked well for a couple days... but since polish and shellac don't really work together too well it peeled a bit on a couple fingers. Nova was great to work with at first but like all heavy glitter polishes, it got super thick fairly quick.


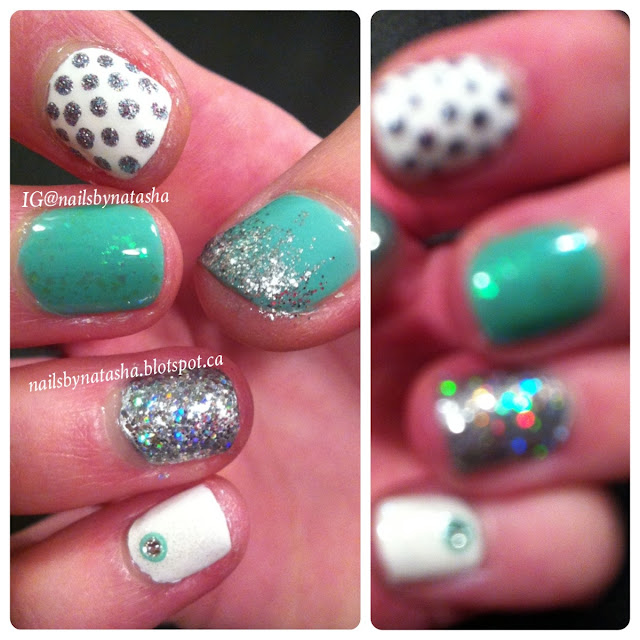
This was done for my other friend. It's a nice way to jazz up a plain skittle mani! The teal colour used was Essie - Turquoise & Caicos. I used this for the thumb and middle finger, and dot on the pinky. The white on the first finger and pinky is a random brand from a random store. It has great coverage which I really like cause that's sometimes hard to find with whites! The base on the ring finger is NOPI - Positive Energy. For the thumb, the glitter gradient was created using Orly - Tiara. The dots on the pointer finger are NOPI - Look At Me, Look At Me. On the middle finger, there's some subtle holographic flakies, Zoya - Opal. The glitter on the ring finger is CG - Nova, I used two coats. The dot on the pinky, like I said, was the Essie polish, and then I placed a 1.5mm rhinestone (purchased on eBay) in the centre.

Tuesday, January 15, 2013

Today's Mani - Blue & Gold Leopard

Hey guys! So I finally got around to trying a leopard mani! The inspiration for the colours comes from @strawbrie on instagram. I was also happy to cross Sally Hansen's Pacific Blue off my untrieds list! 


These colours are: Sally Hansen - Pacific Blue, Nicole by OPI - The Next CEO, Rimmel - Black Satin 

When doing your nails more than one base colour, does anyone else forget that until they've painted all their nails one colour?! :( As I was painting my pinky I realized I forgot to leave the middle and ring fingers blank for gold... and as I was doing my right hand I only painted my middle finger blue before I remembered! I gotta fix this problem somehow so I don't have to always be restarting some nails and have them not a the same pace as the rest. 

Anyway, here are my nails pre-leopard and pre-cleanup: 


Here are my nails with the leopard dots, minus the outlines. Through watching many, manyyy, maannnyyyy tutorials on leopard manis, I've realized you don't need to have a TON of spots if you're gonna do them a decent size that's manageable to work with. If you're going for major leopard, then you can do them smaller and closer together but you'll need a much finer tool. I'll probably try this someday soon :) But for my nails the key is to have them spread out nicely and all different shapes, as you can see.


To create this look I used different size dotting tools. The biggest to create blue dots, and a medium one to create the black outlines and other random dots. When doing the outline, be as freeform as you like. It looks so much better when it's not all perfect, that's the point! Lopsided outlines are great, and all different types too. You'll see for some of the dots I did two outlines (like brackets), some are disproportionate brackets (one way bigger than the other), and some are almost completely outlined. 

Then in spaces where there's a big gap, fill it in with a blob the same colour as your outline. Do NOT overcrowd the empty spaces with the random blobs, you'll ruin the print! 

The only thing I wish I could change about my leopard print is the size of the outline. It's thicker than I'd like, although I still think it looks really good. I'm so proud of myself for doing this great of a job on my first attempt at a leopard print mani! (P.S. Sorry for my SUPER dry cuticles, I haven't been tending to them as often as I need to, and I took this picture after my first topcoat - I applied two - so I'll be using my Pro FX Apricot Cuticle Oil right after I post this!) 


Happy painting girls! Comment below with a link if you've got a leopard mani you'd like me to see :)

Saturday, January 05, 2013

Some Previous Designs

I apologize in advance for the possibly terrible quality of the pictures, the point is to show you some of my designs, not how awful I am at photographing. Enjoy!