Showing posts with label polish addict. Show all posts

Monday, April 08, 2013

NOTD: Pink and Glitter (Two Untrieds!)

I painted my nails with OPI - ElePhantastic Pink on Monday and I was so in love with it that I didn't want to take it off, but I needed to change it slightly just so I wasn't bored with it. This was the perfect opportunity to use an untried indie! (Most of my indies are untried... I should probably work on changing that.) 


Let me start by telling you about ElePhantastic Pink. I don't remember exactly where I first saw it, but I knew I had to have it. Then one day in the summer I was at the mall and saw it at a couple places but I didn't have cash on me and they didn't take debit, and I think I had just bought nail polish earlier that week so I decided I could get it later, but I regretted that as soon as I left the mall. When I made my order to mBeautyLounge a while back it was one of the first polishes in my cart! None of these pictures show the true colour but I was a little too lazy to check that before I uploaded the pictures on my computer. IRL this is a light pink with peachy undertones. I feel like it's a bit neon because of how it photographed. It is bright in person but doesn't look neon. With two coats there's still some VNL because the formula is a tad thinner than classic OPI but I don't mind - it's only visible in certain lighting. I'm so glad I finally own this polish and that I finally got around to using it because it's definitely one of my favourite pinks. I'll probably need a second bottle soon! 


To jazz up the plain pink I added Polish Addict - Laffy Taffy. These polishes are made by Laura Sanchez and her shop can be found at http://shoppolishaddict.bigcartel.com/. Her instagram is @polish_addict_34. This polish is jam packed with tiny blue, orange, yellow and purple hex, large blue and red hex, some pink squares and silver (I think) micro glitter. Application was very good, the polish wasn't too thick like some indies are. The only trouble I had with glitter placement was with the large hex and squares. I found there weren't enough for my liking so I had to place some of those just so my nail had a variety of glitter. Other than that I'm very satisfied with this polish and very happy I purchased it :) I have four other polishes from Laura so watch out for when I use those! 


What's your favourite pink polish? Is there a pink polish you're desperate to own?

XO Natasha

Sunday, February 03, 2013

Glitter Me Crazy!

Lately I've been really obsessed with glitter. There's a ton of different kinds of glitter; this can be really confusing. There's a ton of different shapes and sizes too. There's round, square, hex, bar, holographic, shimmer... the list goes on. I'm not really an expert at this in the least, so I'm not going to pretend to be. All I know is I love glitter! 


There's so much you can do with glitter. The most common thing is to just layer it over polish. I really like this if the two colours are similar or if the glitter is very very fine and it just adds a nice sparkle to the mani. You can also create a glitter gradient - a little time consuming, especially on your first try because it takes some practice before you figure out how to spread the glitter out so it makes a nice gradient. You can also use it to create designs, or go under another polish, or even make a jelly sandwich. The possibilities are endless! 

Here are a few of my favourite glitters! 


China Glaze - Nova 
This is a beautiful rainbow glitter polish, it's got two sizes of hex glitters suspended in a clear base. 

NOPI - Gone Wishin'
I love this purple and blue glitter, it adds a little extra dazzle to any polish! Suspended in a clear base. 

Sally Hansen - Rock 'n' Roll
This isn't a glitter as much as it is a translucent pink shimmer. I love adding this over top of any colour, it gives the base colour a whole new look! 

NOPI - Look At Me, Look At Me
I've enjoyed this every time I've used it. Who doesn't love a polish thick with nothing but glitter? It's about 90% silver glitter, 10% pink glitter. Almost opaque in one coat, but I always use two. 

Finger Paints - Art You Wondering?
This is my favourite polish to put on top of China Glaze - Turned Up Turquoise. The colours were meant for each other! Click here to see my blog post about them. Suspended in a clear base. 

Sally Hansen - Diamonds
This is extremely pretty on top of any colour, it just adds an extra bit of glam. Suspended in a clear base. (Sorry this photo looks really weird, didn't realize it until after :/) 

NOPI - Wear Something Spar-Kylie
Similar to Look At Me, Look At Me, this one is a solid pink glitter. Opaque in two coats. 

Sally Hansen - Bling-Tastic
I love the colour of this glitter! It's got tiny blue hex with bigger silver hex, suspended in a clear base. I like using this when doing nail art. 

Orly - Tiara
Silver hex suspended in a clear base. Very pretty when doing glitter gradients. 

Revlon - Sparkling
Large and tiny pink hex suspended in a milky pink base. I also love this one for glitter gradients! 

Deborah Lippmann - Mermaid's Dream
Tiny teal hex suspended in a teal shimmer base, with tiny rainbow hex and bigger blue hex. One of my absolute favourite polishes of all time; definitely makes me feel like a mermaid! 

NOPI - Fabulous Is My Middle Name
Silver, red, purple and black bar glitter, and tiny silver hex suspended in a clear base. What can I say, bar glitter, especially with those four colours mixed together, is stunning! 

China Glaze - It's A Trap-eze!
Small and large blue, green, yellow, silver, pink and orange hex suspended in a milky base. Everyone loves this one, and for good reason! So much colourful glitter packed into one bottle is simply breathtaking. 


Feel free to comment below and tell me some of your favourite glitters! 

Thursday, January 24, 2013

Deborah Lippmann - Mermaid's Dream

Lately I've been in a crappy/stressy mood so I figured swatching 1) an untried polish and 2) a fancy polish would de-stress me! Mermaid's Dreams by Deborah Lippmann happened to fall in both those categories so I figured I'd swatch it.

Before I even bought this polish I told everyone it was one of my favourites. I wasn't disappointed; this polish is absolutely gorgeous! The pictures do it no justice because I used my iPhone 4 camera, I was too lazy to get out my Canon Rebel T1i!

Here's Mermaid's Dream in the bottle. Who else loves the DL bottles?! They're so classy and elegant.


This is after 3 coats, no top coat. I find the polish to be very thin so 1 coat is definitely not enough, 2 coats was almost enough but there were still a few bald spots although they were not noticeable unless you stared, so 3 coats was just perfect to achieve opacity. It dries a bit textured which is okay for some, but I don't really like textured nails, and I find stuff gets caught or snags on it. 


Here's it is again with two top coats - sorry for the glare! There's still a tiny bit of texture, so I'll be applying a 3rd top coat tomorrow when I get my Pro FX UV Top Coat! For the two top coats pictured I used my Pro FX Quick Dry since I did this before bed and didn't wanna see ugly smudges when I woke up.


Ughhh sorry for my terrible cuticles :( They don't even look as bad in person as they do in this picture! I attempted to get a macro shot of the polish so you could see what's going on here... I did not succeed, clearly! There's all different sizes of the teal glitter, some bigger silver pieces of glitter, and of course the big blue pieces of hex glitter. This polish is just jam packed! Everything works so well together which makes for an absolutely stunning polish.


And one last picture of my whole hand, again, sorry for the glare, that top coat sure is shiny!


Overall, I LOVE this polish. The colour is breathtaking and anyone who purchases it won't be disappointed. Application was good - not bad at all, but definitely not the best. Probably because it's intense glitter, the actual polish is thin (not the formula) and because of the DL brush. The brushes aren't terrible or anything, but I prefer a pro-wide OPI brush, just my personal preference. Glitter placement was probably one of the easiest I've had. There's definitely a good amount of blue hex in this polish; I knew this would be fine since I've seen so many swatches. 

Would I recommend this polish to EVERYONE?! Umm, YES! I know DL's are a bit pricey but this one is absolutely gorgeous! Besides, every girl needs a few expensive polishes to use when she wants to feel extra glamorous or to cheer her up when she's feeling down :) 

Friday, January 18, 2013

A Relaxing Friday Night

I'm being totally lame tonight and didn't wanna go to "country night" at the bar with my friends. I like going out but... country night isn't really my thing. Not because I don't like country music, because I don't know any of the songs! 

So, I chose 8 untried polishes to swatch! My New Year's Resolution is to try all my untrieds... I'm sure many of you also have this resolution LOL! You'll have to excuse my deformed middle fingernail :( It broke last night! Also, there's no topcoat on any of these swatches, I wanted you guys to see the true finishes because we all know what shiny looks like! One last thing, I did no tidy up on these swatches (sorry some of them are brutal) and I sincerely apologize for my AWFUL cuticles... they're extremely dry and need some tending to asap :( 

The first polish I've got to show you is China Glaze - Peachy Keen. I got it about 6 months ago with a bunch of other CG colours - mostly neon/bright ones. I absolutely love peachy colours so I was really excited to try this one. It applied very well, a little bit see through on the first coat but perfectly opaque on the second coat. My only complaint is that the colour in the bottle is more of a peach, whereas the swatched colour looks more like a coral. It's still pretty, just not completely true to the bottle colour. 


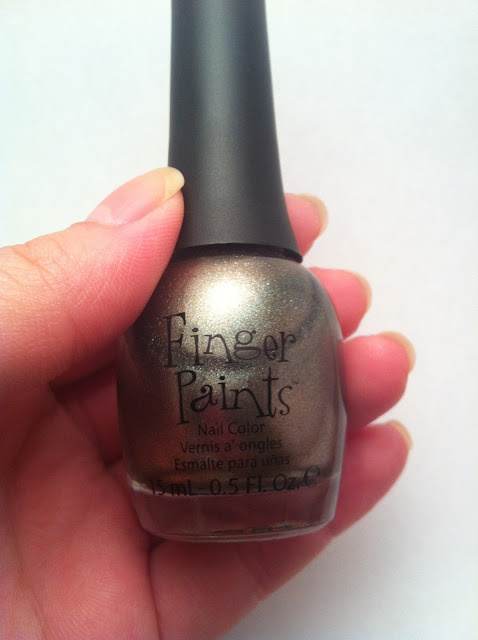
Next up I've got Finger Paints - Fall-ing For You. I randomly got this one from Sally's because it was on sale for $2 - what a deal! Like most metallics, some streaks are visible but they aren't too bad. No problems with application. I didn't think I would like this colour as much as I do, since I normally don't like dark colours, and I like blue but I prefer pink. But having said that, I LOVE this polish! I'll be experimenting putting sparkles over it soon - the sparkles are fine silver sparkles with blue hex :) This polish was opaque on the first coat, but I've done two for the picture.  


Now we have Orly - Synchro. It's a beautiful light duo chrome, I also got it at Sally's for $2! Gotta love those sales! I wasn't sure how translucent it would be, so my first and ring fingers have white base coats but as you see it makes no difference, as this polish is opaque in two coats. No problems with application. It's a nice rosy pink/red, I really like it :) 


This polish is Sinful Colors - Lets Meet. I was super excited to try this one, because it's my first and only SC. I'm not really a huge fan of yellow to begin with so I didn't have any expectations for this polish. My first and ring fingers have white base coats, and middle and pinky have only a clear base coat. Application was fine, but this polish is extremely translucent. All nails have two coats, and as you can see there are still patchy parts. It's a nice shimmery yellow, but I don't think I'll be using it very often. If anything, it'll be a base for a design, possibly a saran wrap mani, maybe even a half moon mani. 


Next up is Finger Paints - Take It or Leaf It. It's like a darker version of CG Swing Baby, which is a darker version of NOPI The Next CEO. I've gotta say, I LOVE all three! I didn't think I would really like the FP one as much but man I think I'm in love! I do enjoy a dark polish every now and then, I think they're rather classy and elegant and that's what this polish is, but it's still fun cause it's metallic! Also, I really don't like gold... jewellery that is. But there's just something about a beautiful gold nail polish! Like most FP, application was great and this colour, like Fall-ing For You, was opaque in one coat, but I've done two coats for the picture. 


This one is Nina - Pearly Brights. I'm not sure if that's the actual name, or it's the collection because this colour is pearly and bright... but that was the only thing written on the bottom of the bottle. This colour is absolutely gorgeous! It looks oddly pink in the picture but it's more of a coral/pink/pearl in real life. This colour is pretty up there with the colour of CG Flip Flop Fantasy... I love how bright it is. It's neon but doesn't need a white base which is awesome! Like most neons/brights, it dries semi matte. The absolute WORST part of the polish though... THE BRUSH IS TERRIBLE! I should have taken a picture of it because it was just awful. Maybe some of you like the Nina brushes, or maybe I just got a terribly cut one... but it's awful. It's way too wide (like the width of my pinky!) and one side was rounded but the other wasn't so it was a square! Umm talk about annoying... The application was okay even though the brush wasn't, and the polish was opaque in two coats. 


Next is Revlon - Minted. The first time I saw this colour was on @higasaurus's instagram. I had a couple other mints but something about this one just stood out to me and I knew I HAD to have it. Revlon did another mint, very similar, called Jaded. I almost bought it but I'm glad I didn't because I was holding out for Minted! I think what sets this mint apart from other mints is that it's got more of a green tinge. Yes, I know mint is supposed to be green, but it's usually a lot whiter and softer. Application was great, this polish became opaque in two coats. The formula was a little on the thick side though but it's still very easy to work with. My only complaint is with Revlon brushes, they're rather skinny so it's a little annoying cause I like brushes like OPI's where I can polish a nail in 3 sweeps. With Revlon it's about 5 sweeps. This gorgeous colour makes up for the sucky brush though! 


This last one is Revlon - Whimsical, over Minted. I've been seeing lots of people talk about this polish on instagram, as well as Girly. I bought them at the same time and I finally got around to using Girly yesterday on my friend over Revlon's Lily which is a beautiful light purple. Girly was very pretty, I'm going to try it over pink next. Like Girly, Whimsical is stunning in the bottle. However, when applied, the glitter is very sparse and placing it is frustrating. There are two coats of Whimsical pictured below, but that's after extensive glitter placement. I might try it over a ligher mint again, because like I said Minted is just greener than most mints so it altered the colour of Whimsical a bit, I think it looks a little odd with the glitter but it's still pretty. I'm not completely sold on this polish. I think I'll need to experiment with it on top of different colours, or even in a jelly sandwich before I can make up my mind about it. 


If you're reading this, thanks for sticking with me through my first swatching session! I had a lot of fun swatching, because I got to see lots of new colours that I haven't before, and I even fell in love with a couple new ones! I've still got a ton of untrieds which I'm slowly getting around to using... and I have more polish on its way so that means even more swatching! I think this was a great way to end the week, I've been a little stressed lately but somehow polish always seems to relax me. I realize how sad that is... and that I'm rambling... so have a great weekend ladies! 

Tuesday, January 08, 2013

Cuticle Care

I just thought I'd share my cuticle routine with you! I never used to care about my cuticles until a couple years ago, but I only really started getting serious about them 6 months ago. Since then I've noticed they're a lot healthier and happier! 

The first cuticle product I ever used was Burt's Bees Cuticle Cream. It's semi expensive for a little jar but it lasts a long time because it's very compressed. It's got a lovely lemon scent too, which I love! Just use your fingers to rub some on your cuticles. You don't need an excessive amount just enough to moisturize. For best results do this 2-3 times daily. 


The Second product I used was Sally Hansen's Vitamin E Cuticle Oil. Now, I loved my Burt's Bees, but this stuff was amazing! Probably because it was made with vitamin e. For those who don't know, vitamin e helps with repairing scar tissue while providing moisture so that's why it's so good for your cuticles. Putting vitamin e on a wound that's starting to heal will help decrease the appearance of the scar later on! 
All sorts of vitamin e products can be purchased at a drugstore or even Walmart, such as pure vitamin e oil (a little expensive but totally worth it in my opinion), and Webber's Vitamin E gel and cream, which I own and have applied to my tattoos as recommended by my tattoo artist. 
I'd recommend vitamin e if you have really dry cuticles with a lot of hangnails. Mine tend to be dry, especially in this cold Canadian winter weather! 


My next product is Freeman's Bare Hands Cream. Not only do I love the scent of this mint & lavender cream, it reminds me of an Avon cream from when I was younger. It's hand and cuticle cream, so when I use it I make sure my cuticles get a nice moisturize too. 
I'd recommend this, or any other similar hand/cuticle cream if your cuticles are under control but you just want something to moisturize them nicely everyday. 


My last product is Pro FX Apricot Cuticle Oil. I haven't been using this for too long but it works like any other cuticle oil. I love the giant bottle though, so I know it's gonna last me FOREVER! My only disappointment is that it doesn't actually smell like apricot but it works great nonetheless. My friends also love it and made me apply it multiple times on them! 


As far as tools go, my favourite cuticle pusher is my own fingernails. I tend to do this when I'm bored (I always have) or only a little while before I know I'll be changing my manicure (so the gap between my cuticle and polish isn't massive). I do own a couple cuticle pushers, and I prefer metal over anything else, and I like a round edge. 

I've got a few different cuticle cutters, like scissors, the trimmers, and nail clippers of course. I find that the only tool to get close enough for my liking is the Sally Hansen Trimmer, but you've got to be extremely careful when you use it, I cannot stress that enough! Trimming cuticles too close could lead to an infection, and in some cases you actually need antibiotics, so let's just not go down that road. If your cuticles aren't long, you dont' even need to push them back. If you do want to push them back then just do that because they will settle down after pushed. Only cut them if necessary! 


So, we've talked about all the cuticle products I own, now for my actual routine. I push my cuticles once or twice a week so they're fairly small. I only need to trim them once every 1-2 months because I regularly push them. I do my cuticles first to get them out of the way of my mani. I only apply cuticle oil after I've finished the mani and put top coat on, or else the polish won't stick to the cuticle oil on your nail and your mani won't last as long (duh!). I apply my hand/cuticle cream maybe every few days, and I only use my Burt's Bees Cuticle Cream once in a while. This is mostly because it's in my purse and I forget about it since I'm typically at school with my backpack and don't often need to use my purse. 

I used to get a LOT of hangnails when I was younger and I would peel them and bleed and go to school with ugly bandaids :( I've learned since then though... NEVER EVER PEEL HANGNAILS! Don't touch them until you can cut them off! When you do cut them, use nail clippers and try to get as close to the base as you can then moisturize right away. I still get hangnails sometimes, but they're very tiny. I don't moisturize as often as I should so that's why they're drier than I want them. As long as you moisturize them after you push them, and you moisturize at least once daily then you should be set! Like I said, you only really need vitamin e as a remedial measure, although it is nice to have once in a while! One little secret I have is if you're out and don't have anything to moisturize them, I just use a bit of my lip chap (carmex exclusively) and rub it on my cuticles to make them happy! 

Hope this helped you if that's what you were looking for! Comment below and let me know what you guys do for your cuticles :)

Monday, January 07, 2013

Homemade Light Box

I've been struggling to capture the real colour of my polishes/manis for a while now, and I've seen some ladies who have bought light boxes and it produced incredible results! Now, I didn't need one that bad, as to purchase an expensive one. So, being the broke university student that I am, I googled how to make my own.

This is my finished light box! Small, I know. But I'm only going to be photographing a couple polishes at a time, and one hand so this was just perfect. (And don't mind my December calendar in the background, I'm changing it today!)


Here are a couple pictures taken in it with my iPhone 4. 
China Glaze: Turned Up Turquoise 
Finger Paints: Art You Wondering? 


Don't you just love it?! Here are the steps I (generally) followed to make it (I left out the black poster lads covering on top) 

Homemade Light Box 

The only thing I'm going to change is use a lamp with higher watts (I think the one I used for the above pictures is only 25 watts, but for now it'll have to do). The two nail polishes in the pictures aren't true to their colour in real life, so I think a brighter light will solve that problem. Also, I used printer paper as opposed to tissue paper but it shouldn't make too much of a difference.